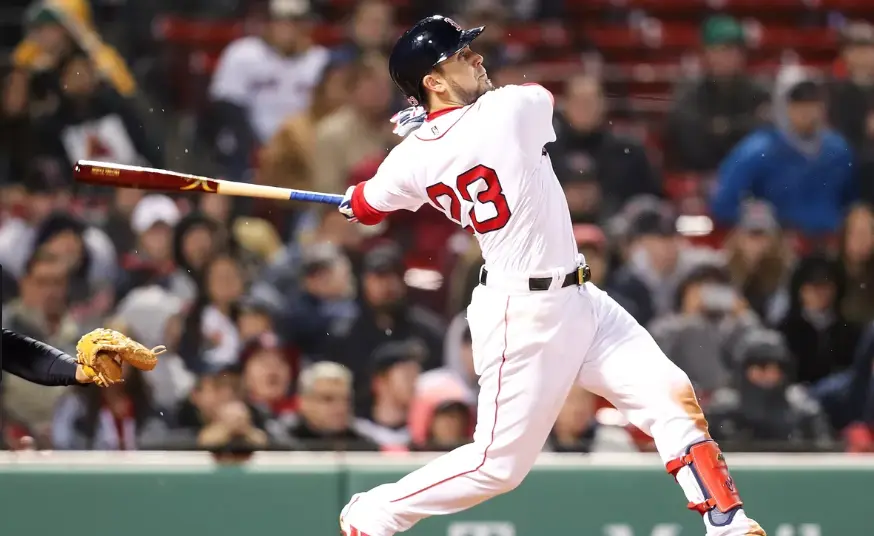
The Best Baseball Drills for a Competitive Practice
Table of Contents
You’ve probably heard the old adage that says “practice how you play.” As a baseball coach, your goal should be to make practice competitive, challenging and fast-paced, so that when your players step into a game they can relax and have fun!
In this article, you’ll find a baseball practice plan template that highlights the best drills for keeping your team energized and engaged throughout the training session.
The concepts and drills below are a great starting point for any team — whether you’re coaching a youth club that’s just learning the fundamentals or a high school team with players working to get to college or the pros.
Table of Contents:
- How to Plan an Effective Baseball Practice
- Drills for Infielders
- Drills for Outfielders
- Drills for Catchers
- Drills for Pitchers
- Team Infield/Outfield
- Baseball Practice Hitting Stations
How to Plan an Effective Baseball Practice
The first step in planning an effective baseball practice is recognizing the need to make a practice plan in the first place. Too many coaches wing it — they show up at the field with an idea of what they want to accomplish that day, but no specific plan or schedule. This leads to inefficient practices that bore players and waste time.
It’s important to evaluate what kinds of work your team needs and then develop a concrete plan that meets those needs. This means coming to every practice session with a thoughtfully-considered schedule that (at the very least) outlines exactly what drills you’ll be doing that day, how long you’ll be spending on them, and which players will be participating in which groups.
With that said, let’s dig into some of the specific considerations and drills that you can implement to make your practice plans more productive.
Related reading: How to Approach Outside Hitting Coaches
Give Your Players Physical Homework
At The Hitting Vault, we firmly believe that understanding and implementing correct body movements is key to unlocking your power. That’s why it’s essential to have stations and aspects of your practice that are devoted to learning these movements and sequences.
Physical homework is an opt-in strategy for players, as they’ll get out what they put in. Members of The Hitting Vault can utilize our library of drills to help with mobility and rotational strength.
For elite players and teams, our SwingFit and SwingFit Elite program includes a baseline testing and lifting regimen. Our content can be a valuable resource for extending your players’ learning and development beyond the diamond or gym.
In the hitting section below, we’ll describe a station based around basic movements that help improve mobility and power development. Whether or not you utilize THV’s members-only content, you should make an effort to give your players a consistent (but not overwhelming) stream of physical homework that’s appropriate for their skill level.
This can include research and writing (such as watching instructional videos and writing short reflections, or watching and analyzing the swings of other players), or practice-based homework like indoor drills or exercises. Your coaching goal should be to empower your players to develop into the best possible athlete that their drive will allow.
Warm Up the Right Way
Have your players jog, stretch, run through plyometrics or whatever warmup routine you have in place. From there, have them throw until their arms are loose.
Ages 12 and up should start doing long toss 2-3 times per week as part of their warmup regimen. Long toss helps open up the arm and is the best way to improve arm strength.
In general, you’ll want to limit this throwing duration to around 15 minutes. Your team’s total warmup should take about 25-30 minutes.
After warming up, players should immediately break into groups of infielders, outfielders, pitchers and catchers.
Drills for Infielders
Daily Infield Drills for Fundamentals and Skill Development
Every day, infielders should be working on their hand-eye coordination by reading ground balls.
There are two ways to field ground balls that are hit right at you: the “funnel” (which is basically absorbing the ball into the body) and the “reverse funnel” (in which the fielder moves through the ball). Both approaches are used at the elite level.
Regardless of whether they funnel or reverse funnel, infielders need to focus on keeping their wrist bent and their fingers pointed towards the ground. It’s a skill that will translate into charging ground balls and fielding line drives on the short hop.
Remember, when it comes to short hops, it’s best to work from the ground up. That’s because it’s easier to adjust to a bad hop that jumps than to one that stays low to the ground. The fielder’s head and eyes should be behind the glove — not only for protection, but also because it helps with tracking the ball into the glove.
The first of our infield drills helps fielders with these short hop skills.
Short Hop Drill
Have infielders begin on their knees with no glove. The players should align in pairs, across from each other and about 10 feet apart. Partners will alternate in throwing firm (but not overpowering) short hops, completing eight reps each of:
- Glove side
- Backhand
- Straight on
Repeat this drill two more times — once standing in the ready position with no glove, and once in the ready position with a glove.
Double Barrel Fielding Drill
After the short hop drill is completed, infielders should break into a double barrel infield. This alignment requires two coaches (or two players, if you lack coaches). Players will field ground balls for a total of 15 minutes, following the template below:
- Round 1: 5-3, 6-4-3 (no throw) and 4-6-3 (no throw)
In this round, the third basemen are throwing across the field to first, so the second basemen and shortstops will field grounders and work on their feeds and footwork to turn a double play without actually finishing.
- Round 2: 5-4-3, 6-2
During this round, the second basemen are working on finishing double plays and turning around throws from third. The shortstops are playing in and making throws to home as if there’s a runner trying to score. Be sure to alternate hitting ground balls for safety purposes; that way, the shortstop doesn’t get in the way of the throw from third to first and take a ball off the side of the head.
- Round 3: 3-6-3, 4-2, 5-2
Here, the first basemen get to work on fielding a grounder, throwing to second and then getting back to the base to turn the double. The second and third basemen will throw home.
Drills for Outfielders
When designing outfield drills, keep in mind that it’s crucial to have players practice ball tracking while sprinting, because they need to develop the athleticism and judgment to successfully chase down fly balls hit into the gap and over their heads. Make sure they’re running on their toes so their heads aren’t bouncing up and down, which makes it hard to track the flight of the ball.
Also, note that elite players need to be able to sprint to a spot on the field without looking at the ball, then picking it up in mid-air on the run.
Why would you want to take your eyes off the ball? Simple: you’re fastest when your head is down and you’re in a normal sprinting position. Have you ever tried sprinting while looking up at the sky? It’s slow and awkward, which makes it the wrong way to get to fly balls.
As outfielders improve, they need to be able to read the ball’s trajectory right off the bat, so they can take the most efficient route possible. The ability to correctly anticipate the ball’s flight path increases their range for the reason stated above — they can just put their head down and go.
This is a skill elite center fielder Kevin Pillar has mastered over the course of his career.
Here are a few outfield drills that can help build this and other important skills.
Triangle Drill with Tennis Balls
This drill helps teach communication skills and pop-up priorities in the outfield. Using this drill, especially with younger athletes, will help build confidence to go after balls that may be out of their comfort zone.
What you need to do is separate your outfielders into three groups and position them at cones arranged as shown in the picture below. This can be done on either side of the field.
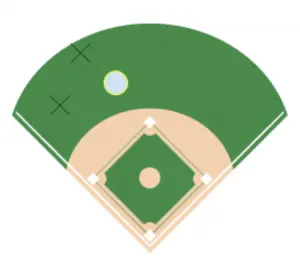
The circled player has priority, meaning that if they call for the ball, the other two players must get out of the way. A simple way to help develop good on-field communication is to have each player converge on the ball; if one of the “X” marked players wants it, they’ll yell “Ball, Ball, Ball” slowly. If the circled player (the one with priority) decides they want it, they’ll call “Ball! Ball! Ball!” loudly and quickly. This allows the non-priority player to hear the priority player, even if they’re both calling for the ball at the same time.
For this drill, you can either throw balls or use fungo bats. Mix it up between throwing balls right at a player (to make sure they’re not cheating and getting an early jump) and placing the ball between the players to force communication.
Fly Ball Reps
Once the outfielders have gone through the triangle drill for 10-15 minutes, hit them a mix of fly balls and ground balls, and have them work on coming through the ball as much as they can.
What we mean by “coming through the ball” is getting behind it and taking a good angle to be ready to crow hop and make an aggressive throw to the relay or base. Their body should not be stationary when they’re catching the ball, but rather moving forward in the direction of the throw. The catch should be made at about eye level.
While these are important reps for outfielders, they do not compare to the ones they need to take in batting practice. Outfielders can read fungo bats easier than reading One Fish, Two Fish by Dr. Seuss, because the hitter usually turns his or her body towards where they intend to hit. In order to improve their reading and reaction times, they need to get plenty of reads off live hitting.
Drills for Catchers
A great team starts with a great catcher. Having a catcher with a high baseball IQ will help keep your team grounded, and having one who can frame pitches to steal strikes, block balls and throw runners out will translate to runs saved and extra wins.
Blocking Drills for Catchers
Catchers who keep balls in the dirt in front of them limit the opposing team’s baserunning ability.
For the first drill, set up six balls about 10 feet apart, off to the side of the baseline. Catchers need to be in full gear for this drill, as they’ll get into their stance and walk in their low squat position forward to each baseball. As they approach each ball, they’ll drop to their knees as if they’re blocking a pitch.
For the six balls, the catcher should slide to their left twice, slide to their right twice, and drop straight down twice.
Do this three times through: your catchers will get tired because this is a leg strengthener, but they need to be able to still block balls with good form at the end of the game and through the long season.
Here are some other worthwhile catching drills to shuffle into your practise.

Receiving and Pitch Framing Drills for Catchers
Good framing can alter the course of a ballgame, because having the ability to get that questionable outside pitch called for a third strike is a momentum changer. The best catchers in Major League Baseball can steal strikes at any point in time, so it’s important to help your catchers start to develop this skill.
To help with this, start saving the plastic lids from to-go containers (like the one pictured below). These are great tools for teaching how to frame pitches.
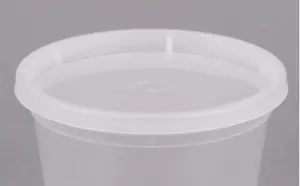
With your catchers in full gear, throw these lids at them like they’re little frisbees. The more they catch, the better. They’re not the easiest to catch at first, but over time they become easier to handle.
This drill teaches catchers how to let the ball travel and be able to stick it where it’s thrown.
Letting the ball travel means allowing the ball to come to you behind the plate; as a catcher, you want to receive the ball without reaching forward for it.
By teaching your players to let the ball travel and stick it, you will find your team stealing a lot more strikes. Atlanta Braves catcher Tyler Flowers is one of the best defensive catchers in the MLB, and this video helps dive into more of the philosophy of a strong receiving catcher.
Another simple and effective way to help your catchers become better at receiving, blocking and framing is to have them catch bullpens over and over again. These are their chances to work with the pitching staff and understand how each pitcher’s arsenal moves.
Defensive Drills for Pitchers
Pitchers’ Fielding Practice
Pitchers need to be able to field their position. To help them get better at it, bring them in towards the end of the infielders’ drills to work on pitchers’ fielding practice (PFP).
Hit ground balls, alternating between the first baseman and the pitcher (with some in between). The goal is to force the pitcher to make a decision between covering the bag or fielding the ball. This drill isn’t relevant for softball, as pitchers aren’t required to cover first.
When covering first, the pitcher should cut up along the inside of the base path, running parallel to (but not on) the foul line. The pitcher should never cross the foul line, as doing so puts the player at risk for getting barreled into by the runner.
As the pitcher approaches the bag, the first baseman gives a nice underhand feed, leading the pitcher to the base. The pitcher receives the feed, taps the bag, and curls off into fair territory.
Seven and Ones
This drill gets both pitchers and infielders involved, and should be done for about 10 minutes before the whole team comes together for infield/outfield.
There are seven plays that occur during this drill, which moves fast. That means that each ball will be hit shortly after completion of the previous play.
- Ground ball to either the first baseman or the pitcher. Make the out at first.
- Ground ball to the pitcher, who throws to second to complete a 1-6-3 double play.
- Ground ball to third base, turning a 5-4-3 double play.
- Ground ball to second base, turning a 4-6-3 double play.
- Ground ball to first, turning a 3-6-3 double play with the pitcher covering (if necessary).
- Bunt down the third base line, forcing communication between the pitcher, the third baseman and the catcher.
- Soft ground ball or bunt to the pitcher with a glove flip home to prevent a suicide squeeze.
Team Infield/Outfield
This is where players take the reps they just performed in their group session and bring them to life in a game simulation. Hit a mix of fly balls and ground balls to the outfielders, forcing them to take different routes and make harder throws (including throwing through the relay).
Start with balls to the outfielders, throwing to bases in the following order:
- 2 throws each to second base
- 2 throws each to third base
- 2 throws each to home
Once the outfielders are done, they can go grab some water while the infielders take their ground balls as follows:
- 2 plays each to first
- 2 double plays each
- 1 play with the infield in to cut a runner down at home
- 1 long-short
For the long-short, align the infielders at their maximum depth for their respective positions. Hit a hard grounder to their right side, forcing them to set their feet and make a long cross-field throw to first. Hitting the ball to their deep right also prevents them from cheating by playing up on the ball.
After making the long throw to first, they’ll immediately charge a slow roller set down by the catcher (or the coach), and make the play to first.
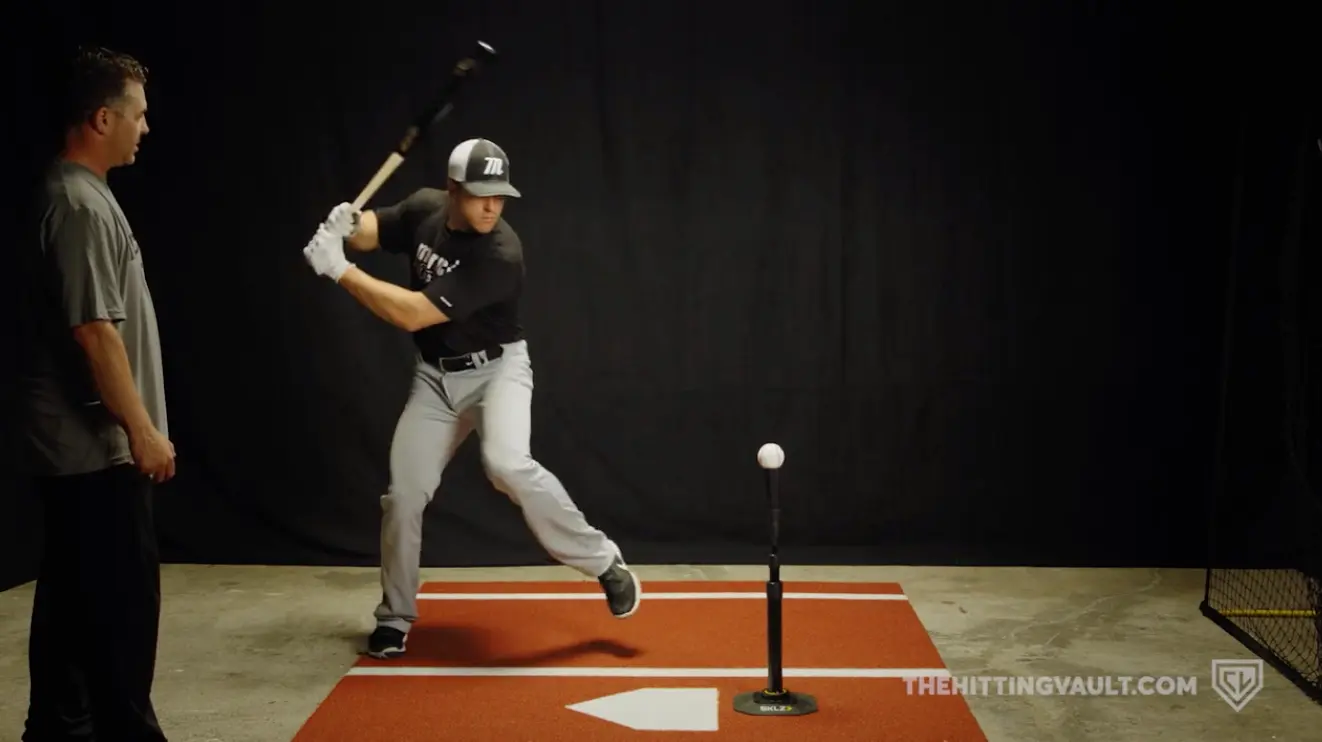
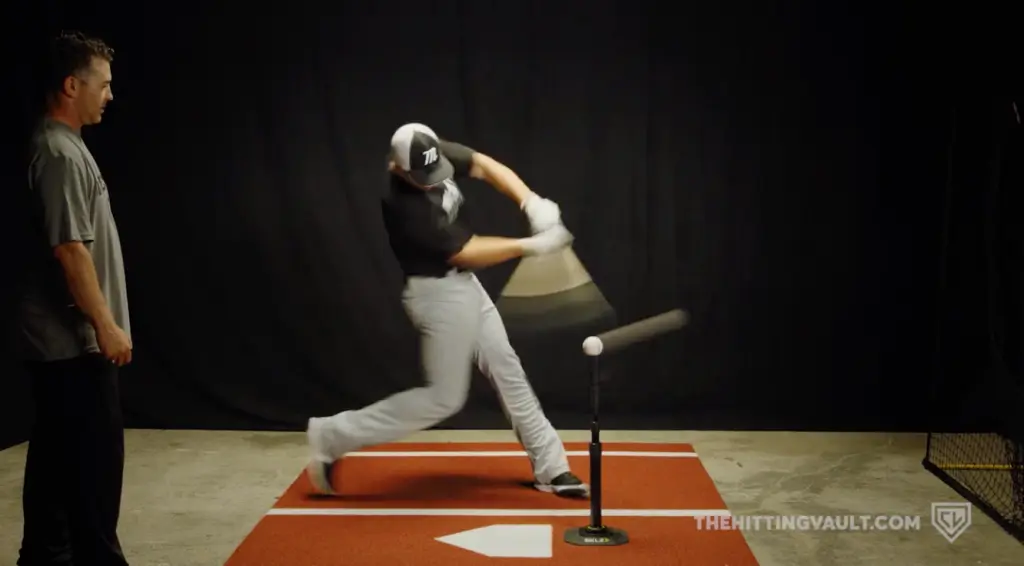
Baseball Practice Hitting Stations
As we mentioned earlier in this practice plan, understanding and implementing the correct sequence of movements is essential for producing power at the plate. As a coach, you should utilize hitting stations that help players learn, develop, and master these movements.
Looking for a new bat for your team? Check out the 2022 lineup of baseball bats from JustBats.
There are four stations you should have in the hitting part of your practice to teach different movements, build good habits and develop muscle memory.
Hitting Station #1: Movement Station
Having a good movement sequence is one of the keys to unlocking your power, so hitters need to start learning early how the body should move towards the ball for maximum impact.
Two great drills that can be done for this are the Resisted Separation Drill and the Separation Drill.
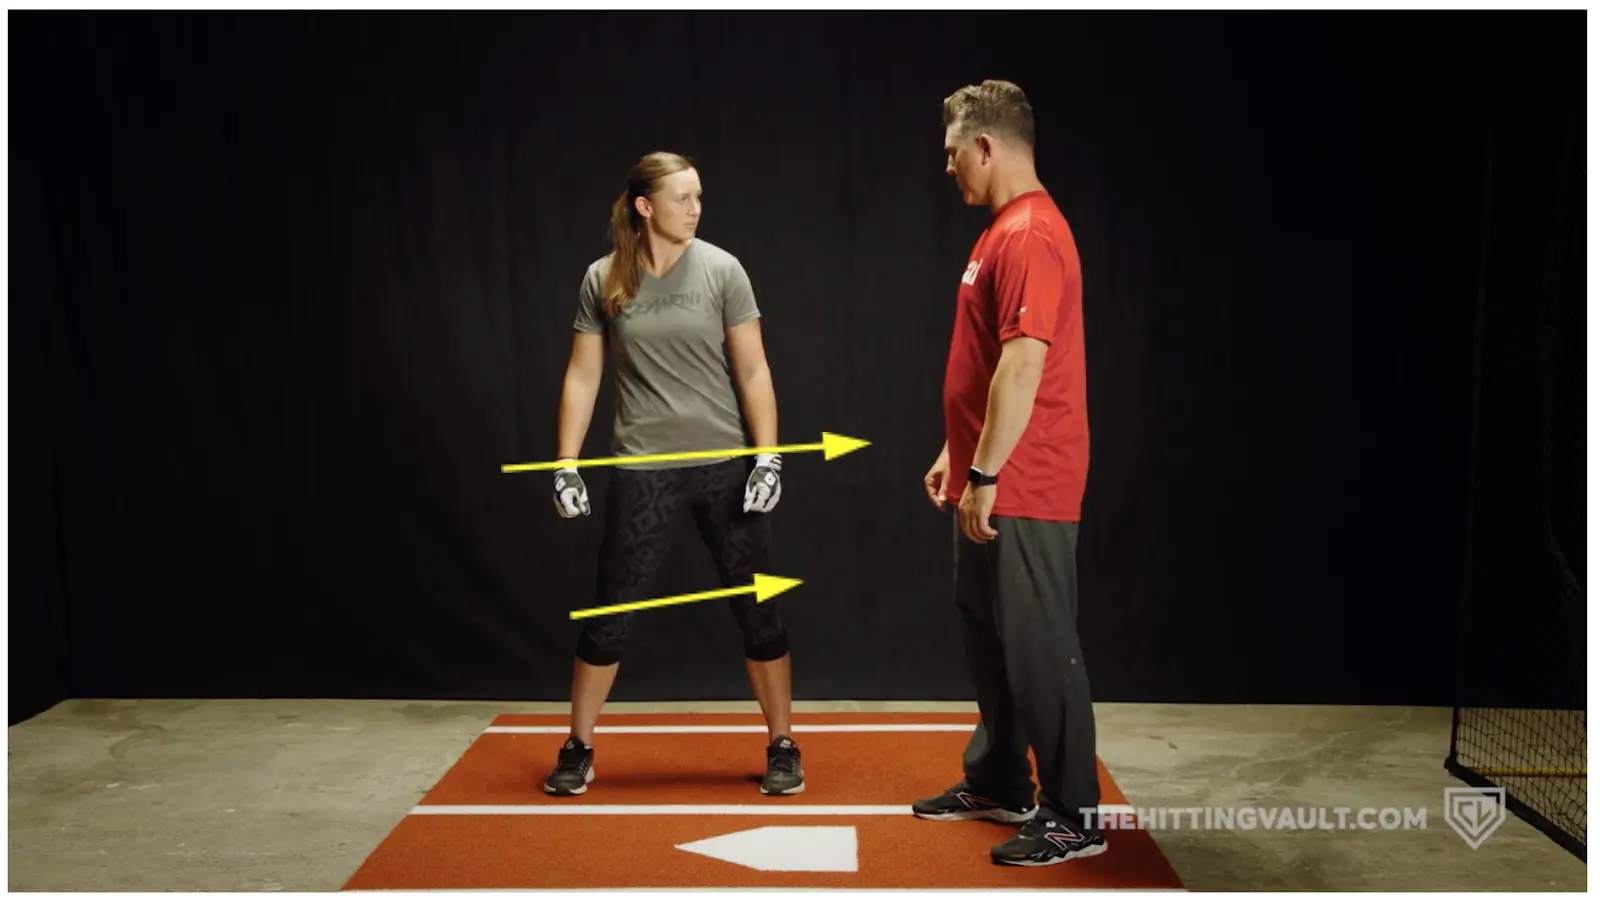
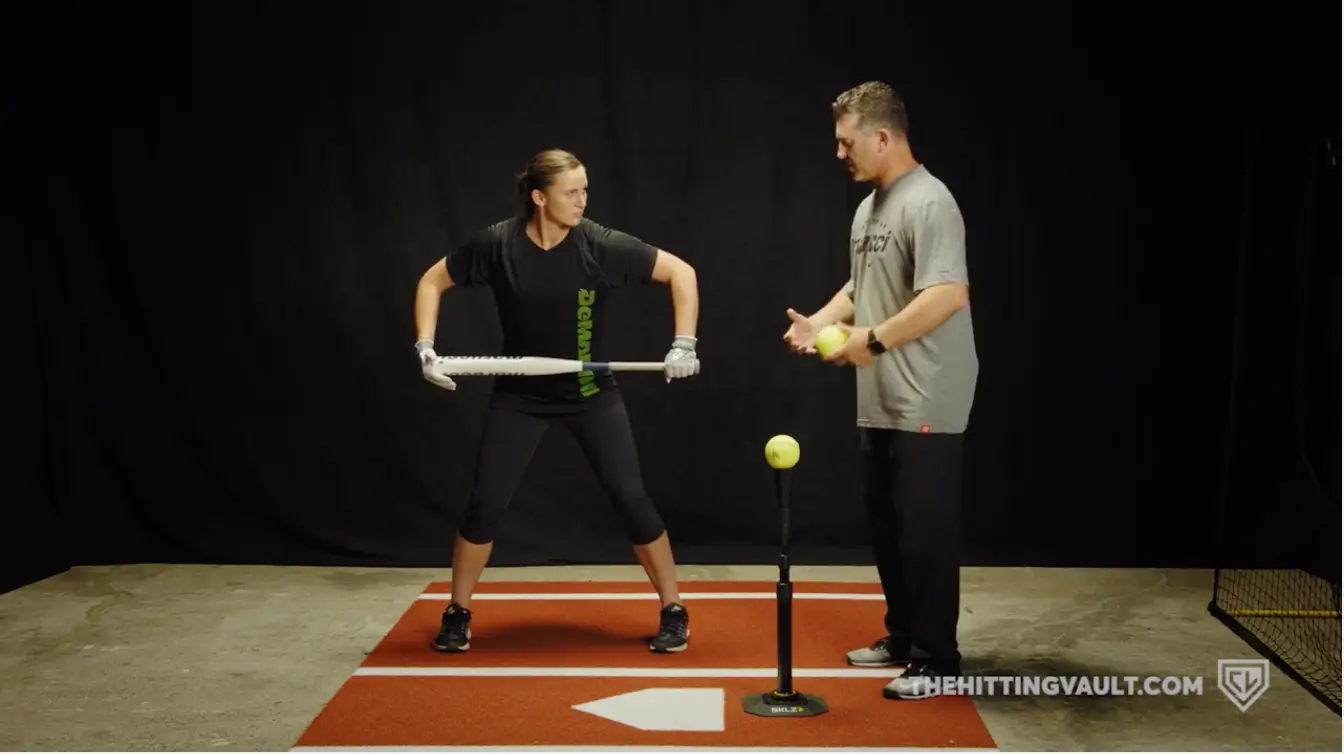
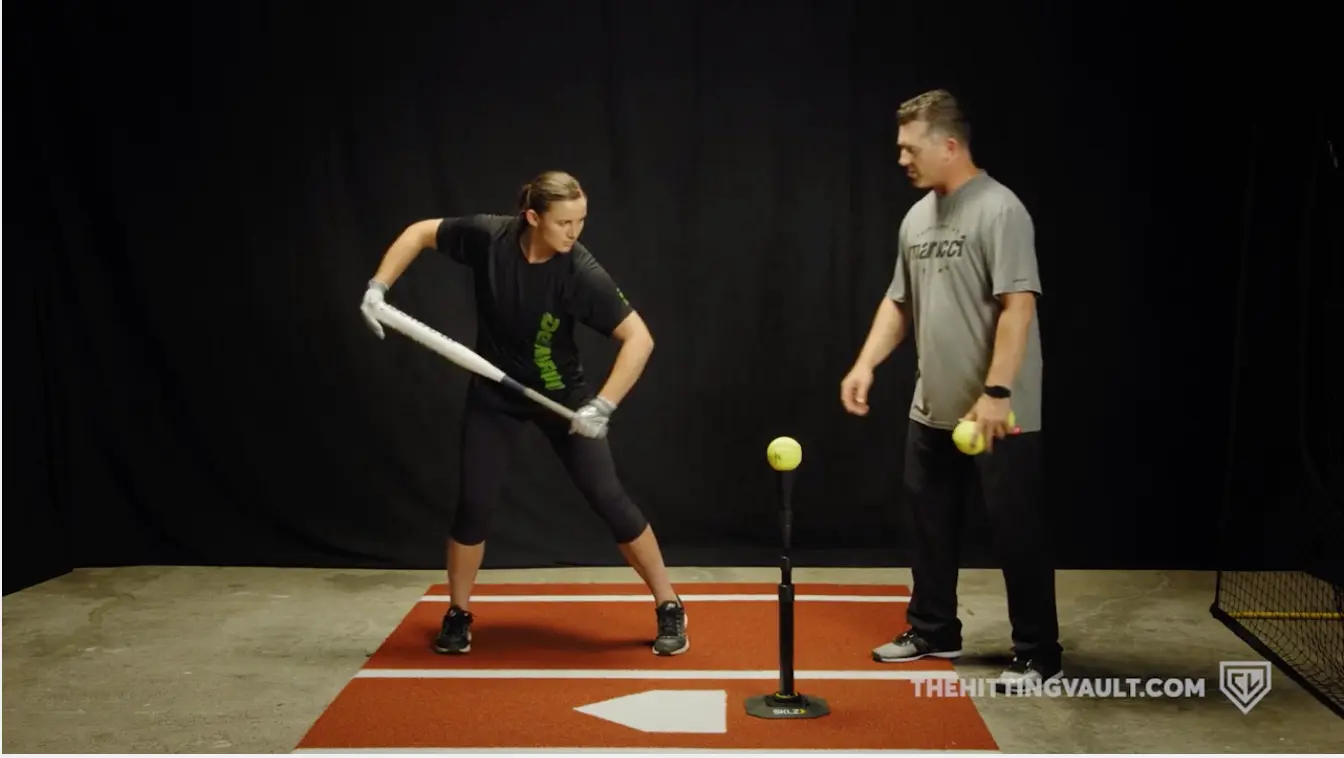
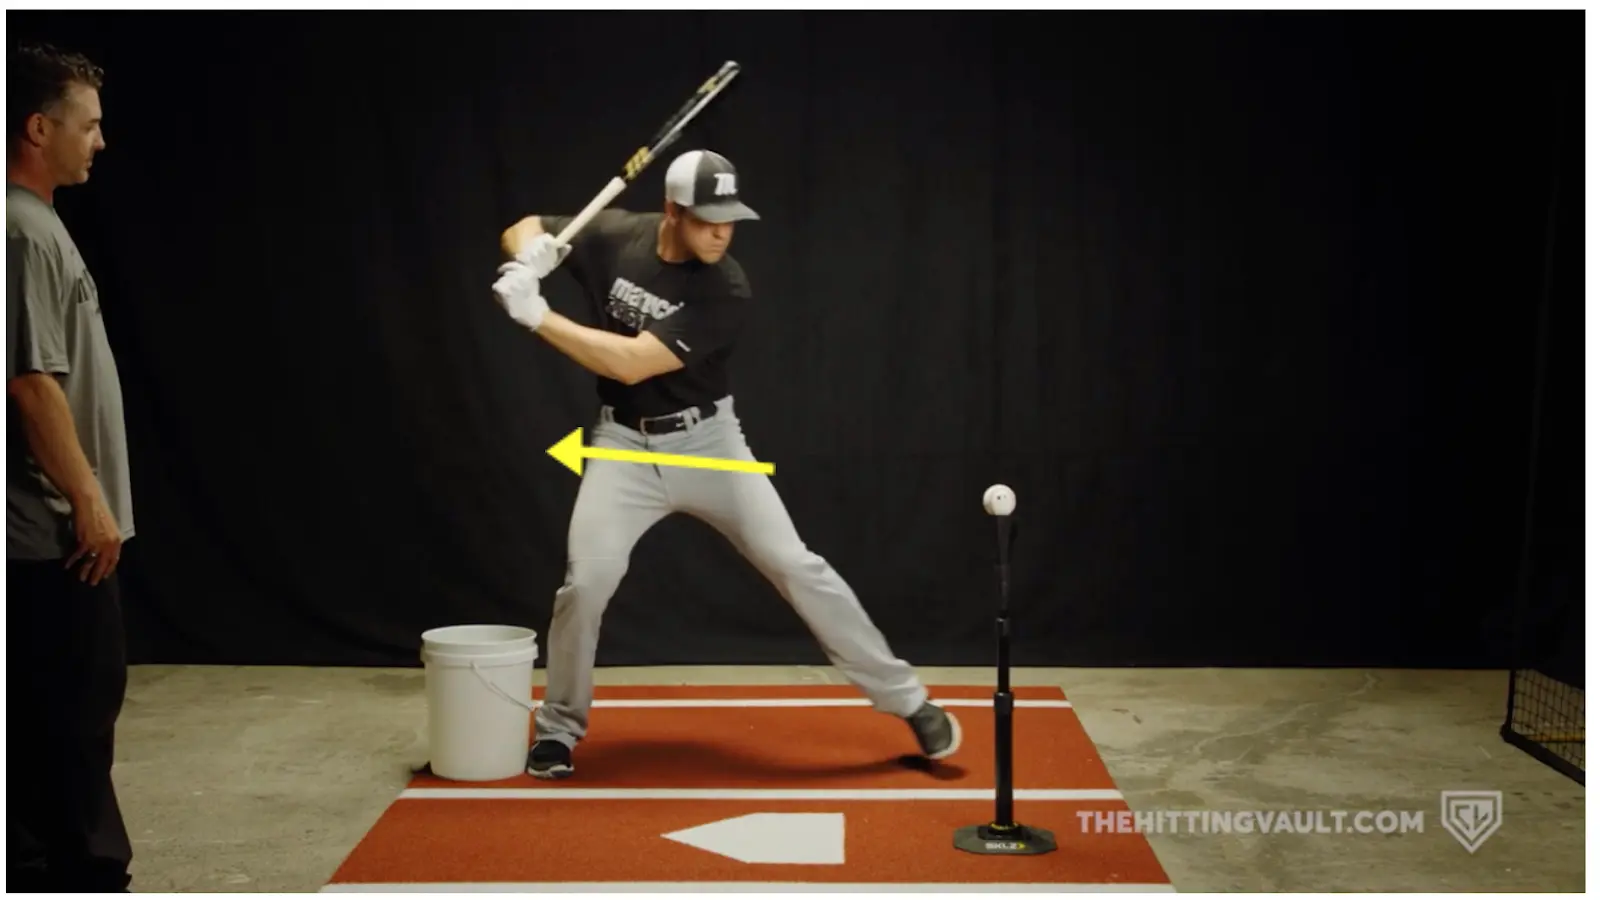
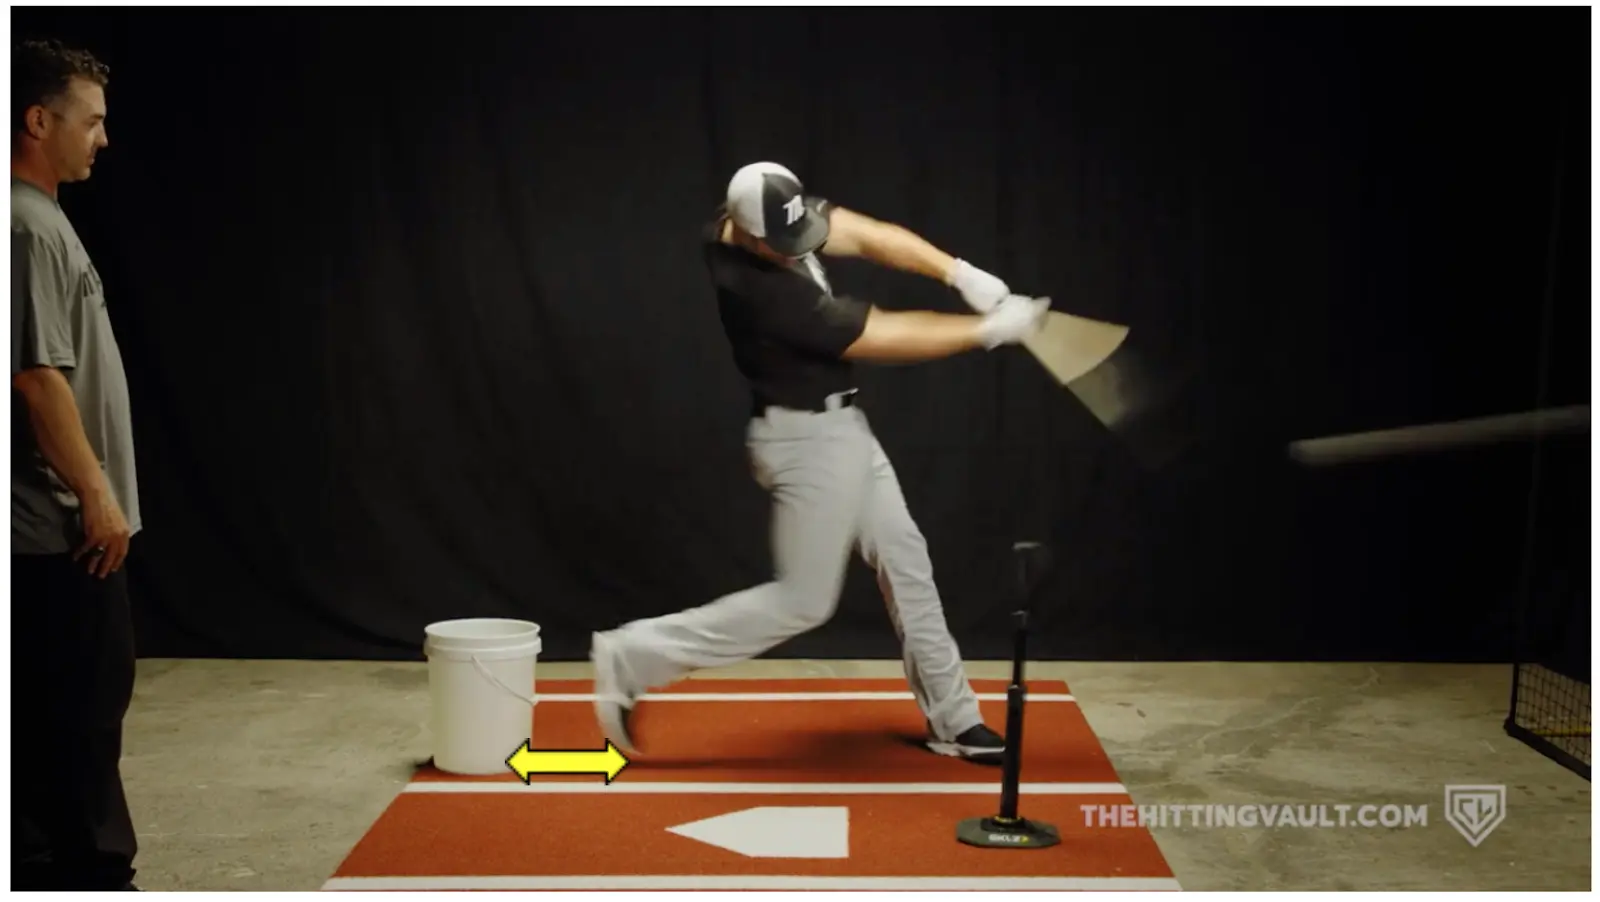
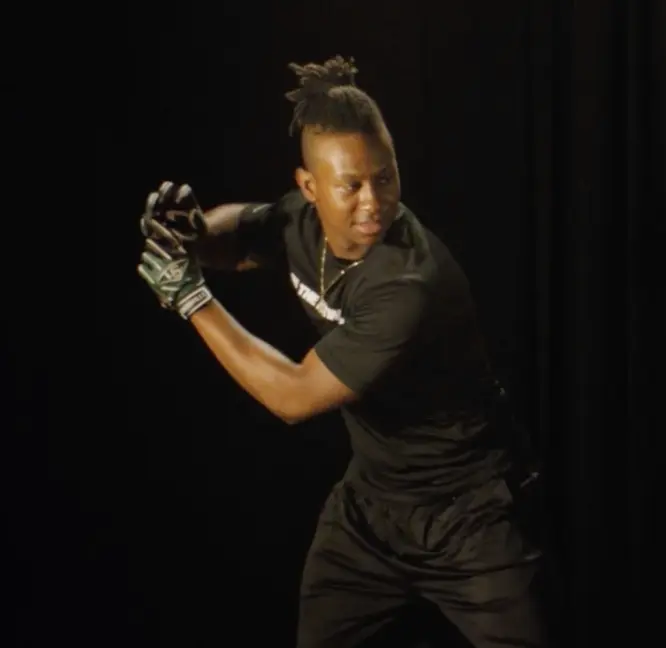
Resisted Separation Drill
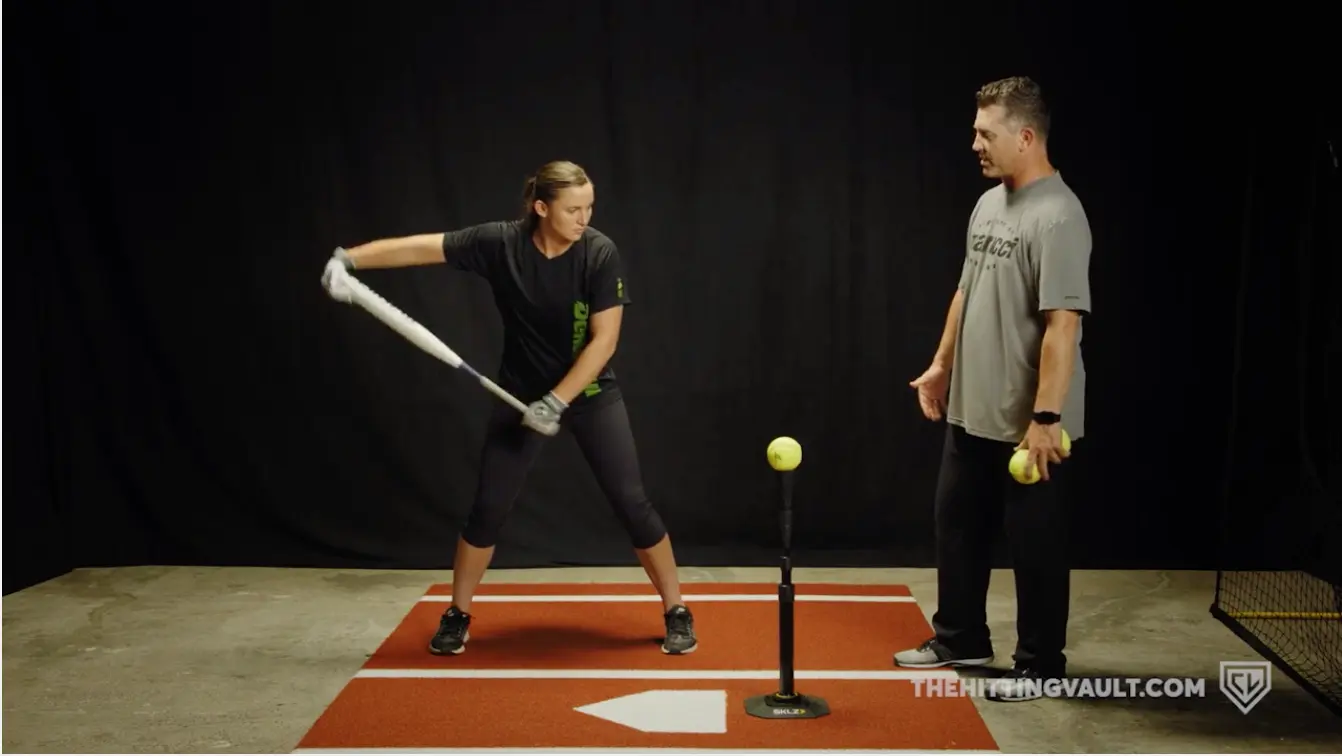
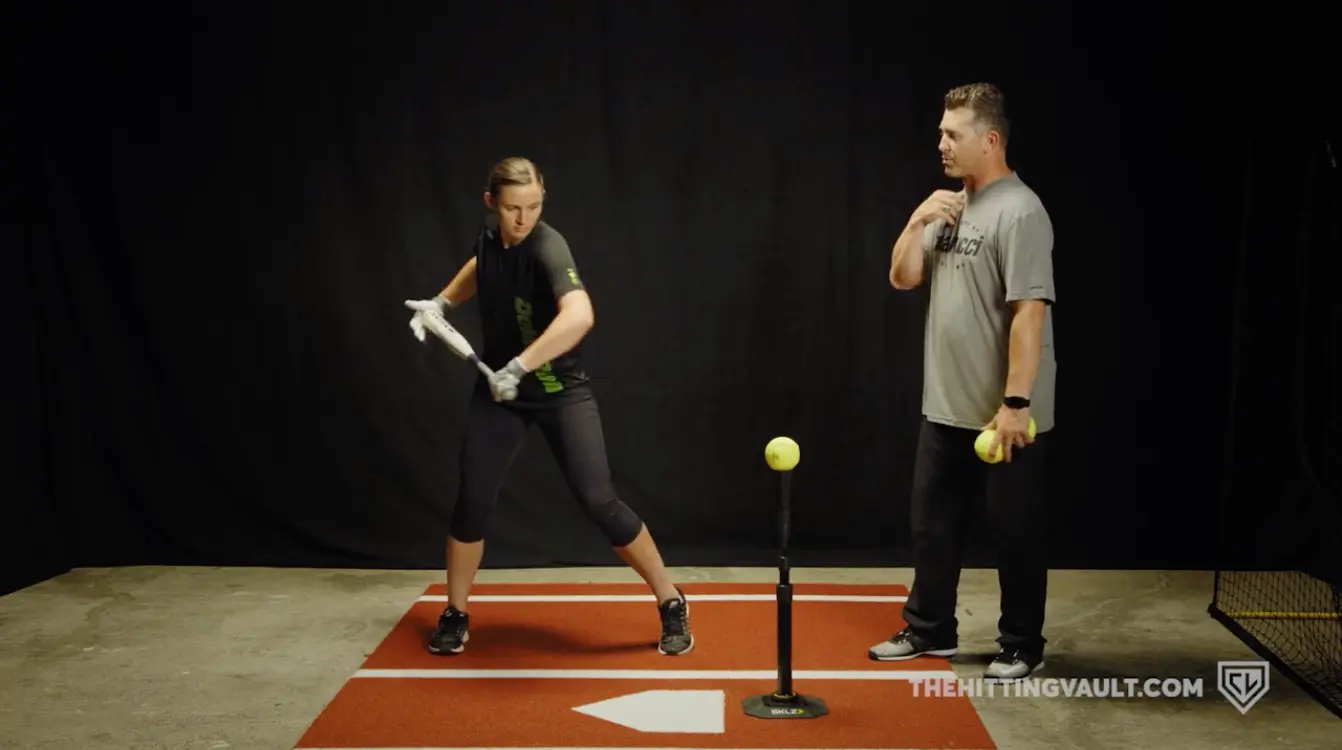
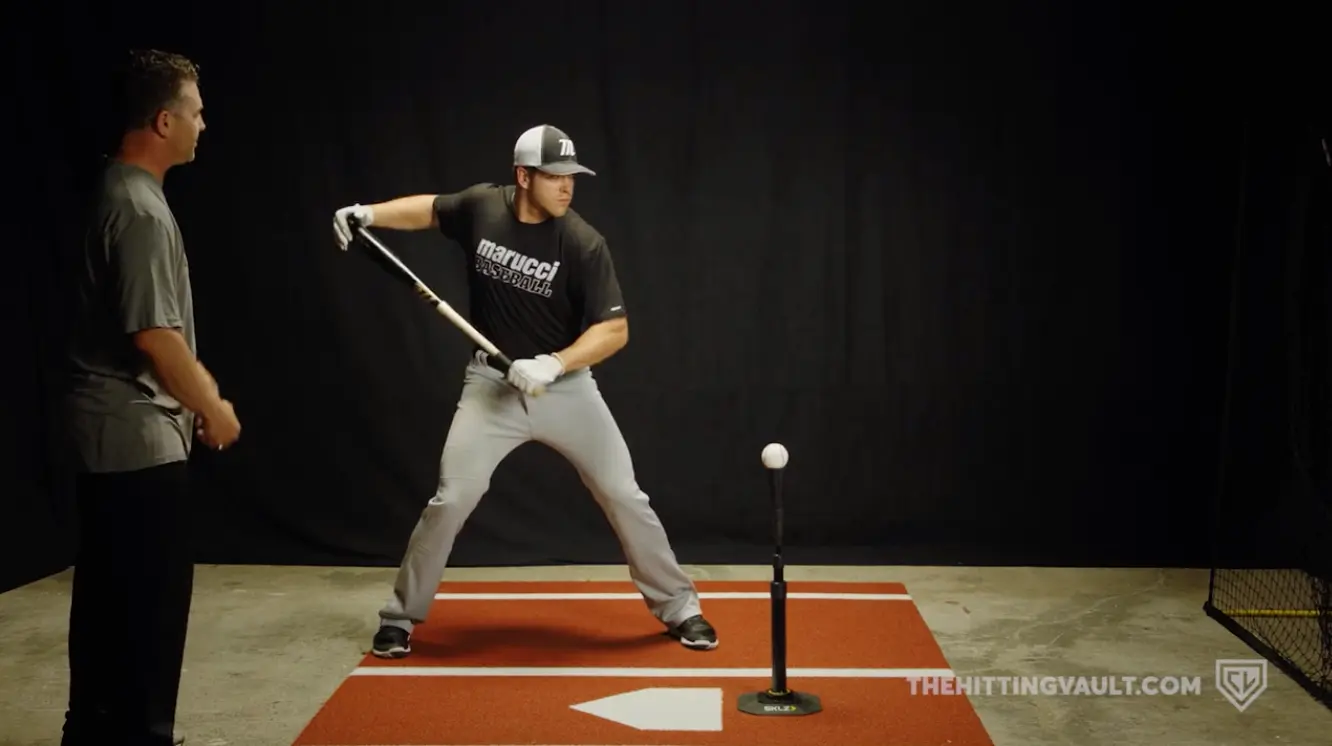
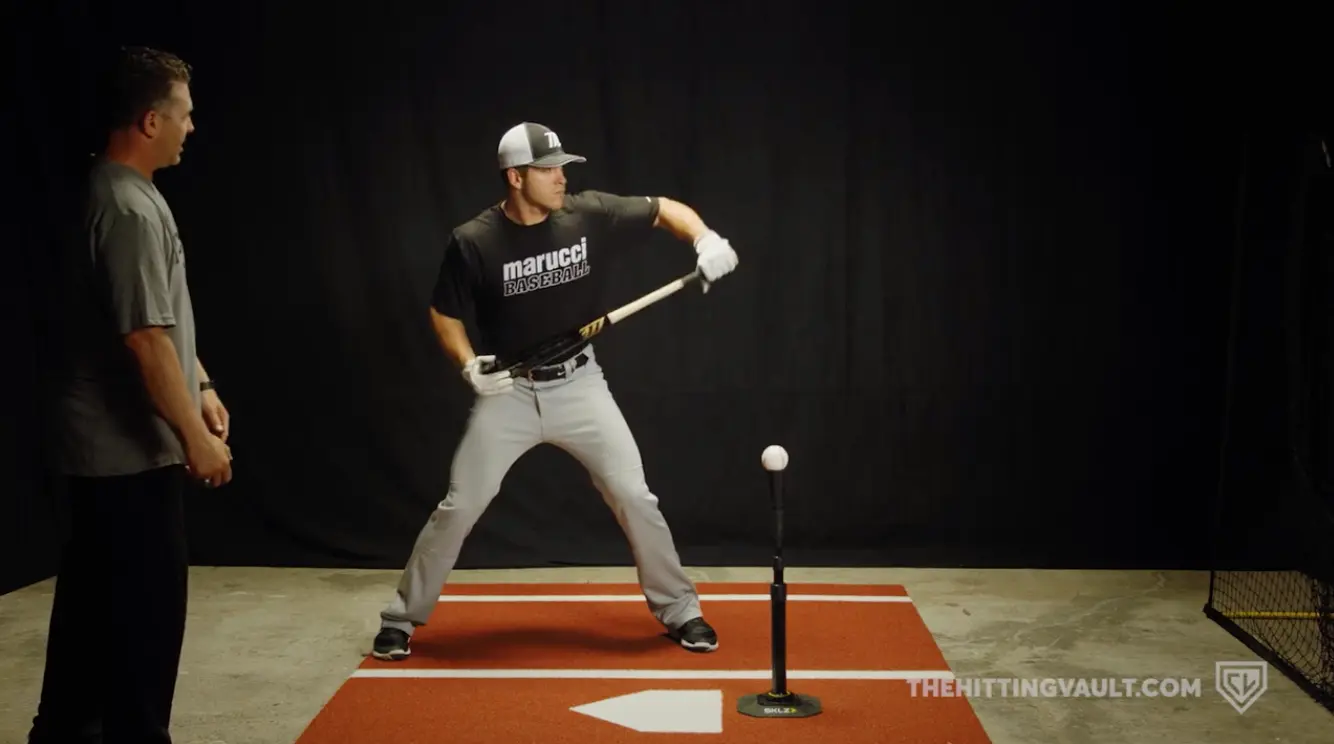
The Resisted Separation Drill helps hitters feel the correct sequence, which is hips then torso, with the barrel of the bat getting on the correct plane as early as possible. If you have Jaeger Bands or similar bands, you’ll want to use those. If not, you can do the drill without the bands, or just tie some rope (comfortably) around the players’ wrist.
In the left picture (below), Coach Peterson is in a good launch position. In the picture on the right, she’s moving towards contact. If you’re not fully versed in the importance of launch position, you can learn more in this article.
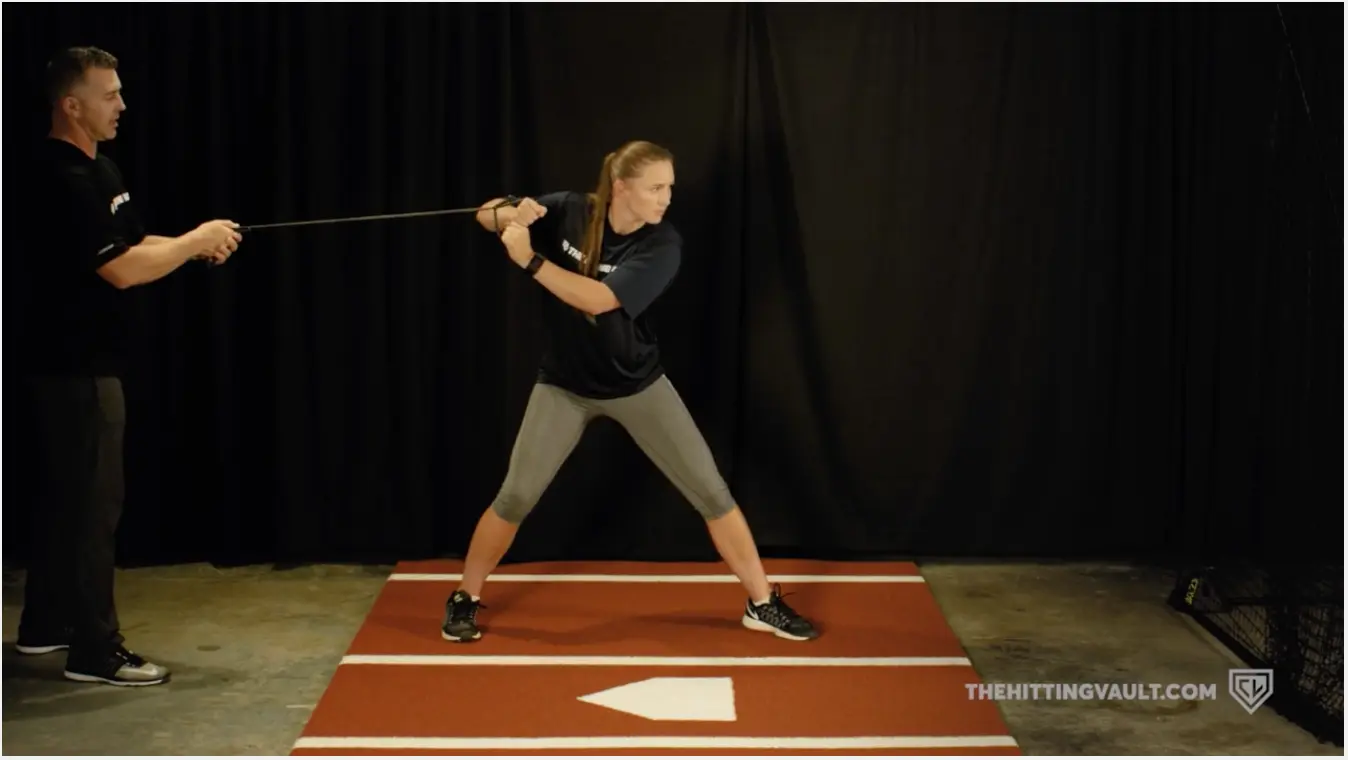
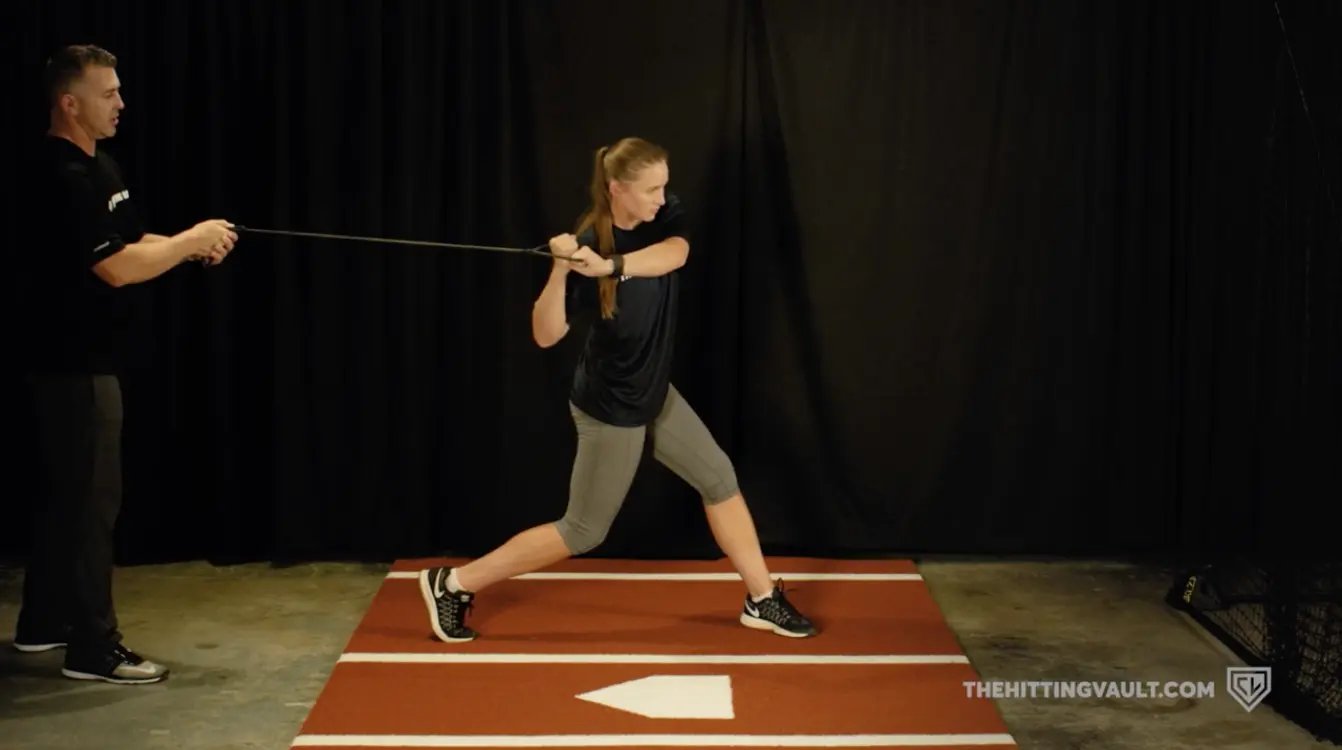
Your hitters should not go further than Coach Peterson’s position in the picture on the right. She has created good separation in her launch position, and from there is turning her hips while getting the bat on plane. The feeling of her shoulders and hands staying back while her front hip opens to the pitcher creates the correct sequence (hips, then torso, then hands and barrel).
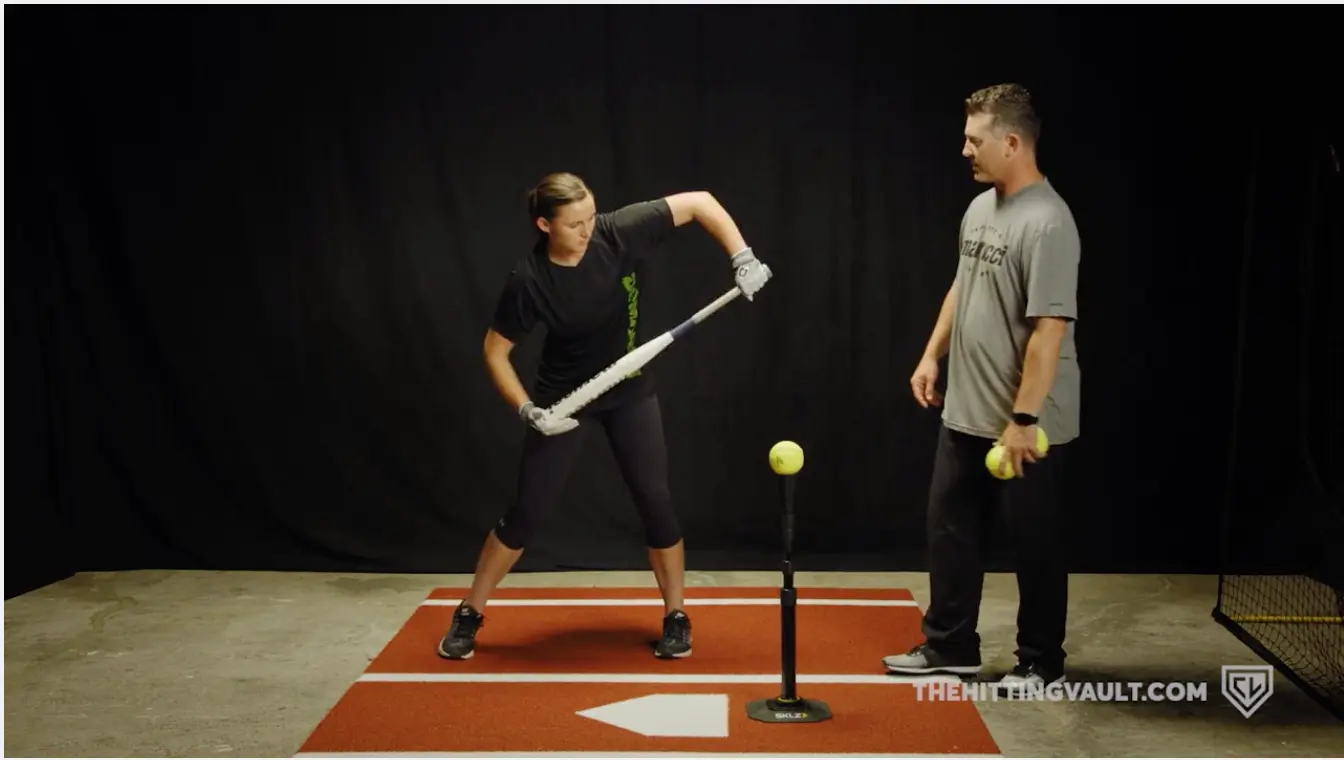
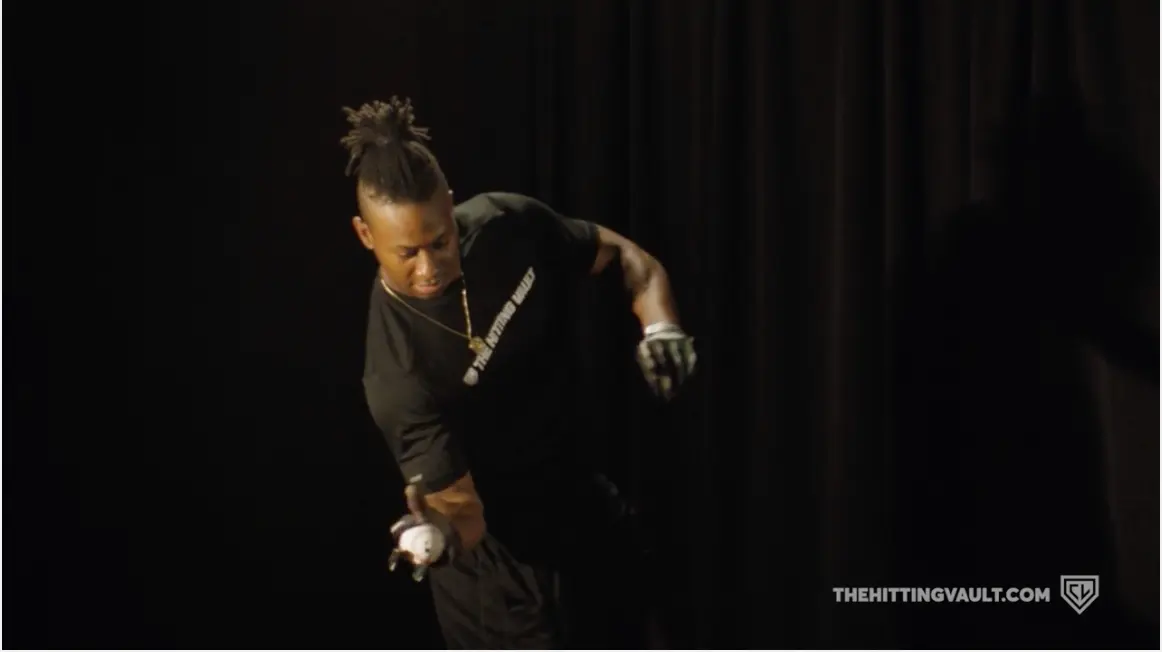
Separation Drill (Without Bands)
Another effective drill is the Separation Drill. Here, the hitter starts in his or her stance, looking at the pitcher. From there, they will internally rotate their front hip. Notice the wrinkles in Coach Peterson’s shirt, which illustrates the desired rotation.
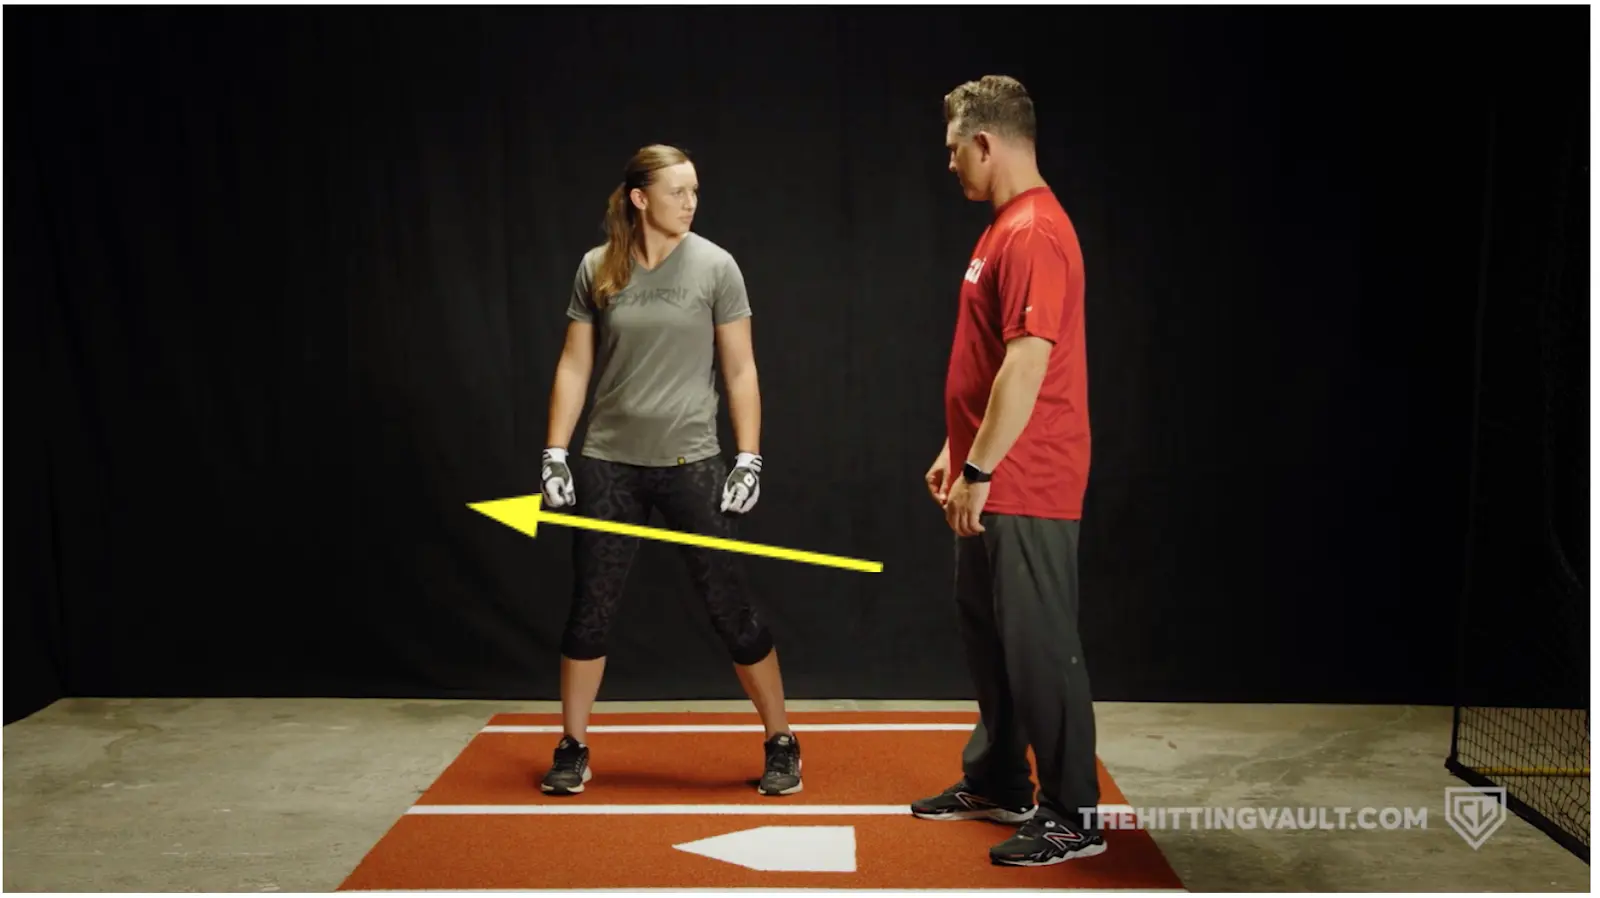
From that rotated position, the hitter explodes through the zone with their hips (while keeping their shoulders square).
This is strictly a lower half drill that teaches the movement of the hips and torso while separating it from the shoulders. These are two different movements: hitters need to be able to explode through the zone with their lower half before their upper body follows.
In the picture below, you can see that the wrinkles in Coach Peterson’s shirt have changed direction. That’s because she’s now externally rotating as opposed to internally rotating.
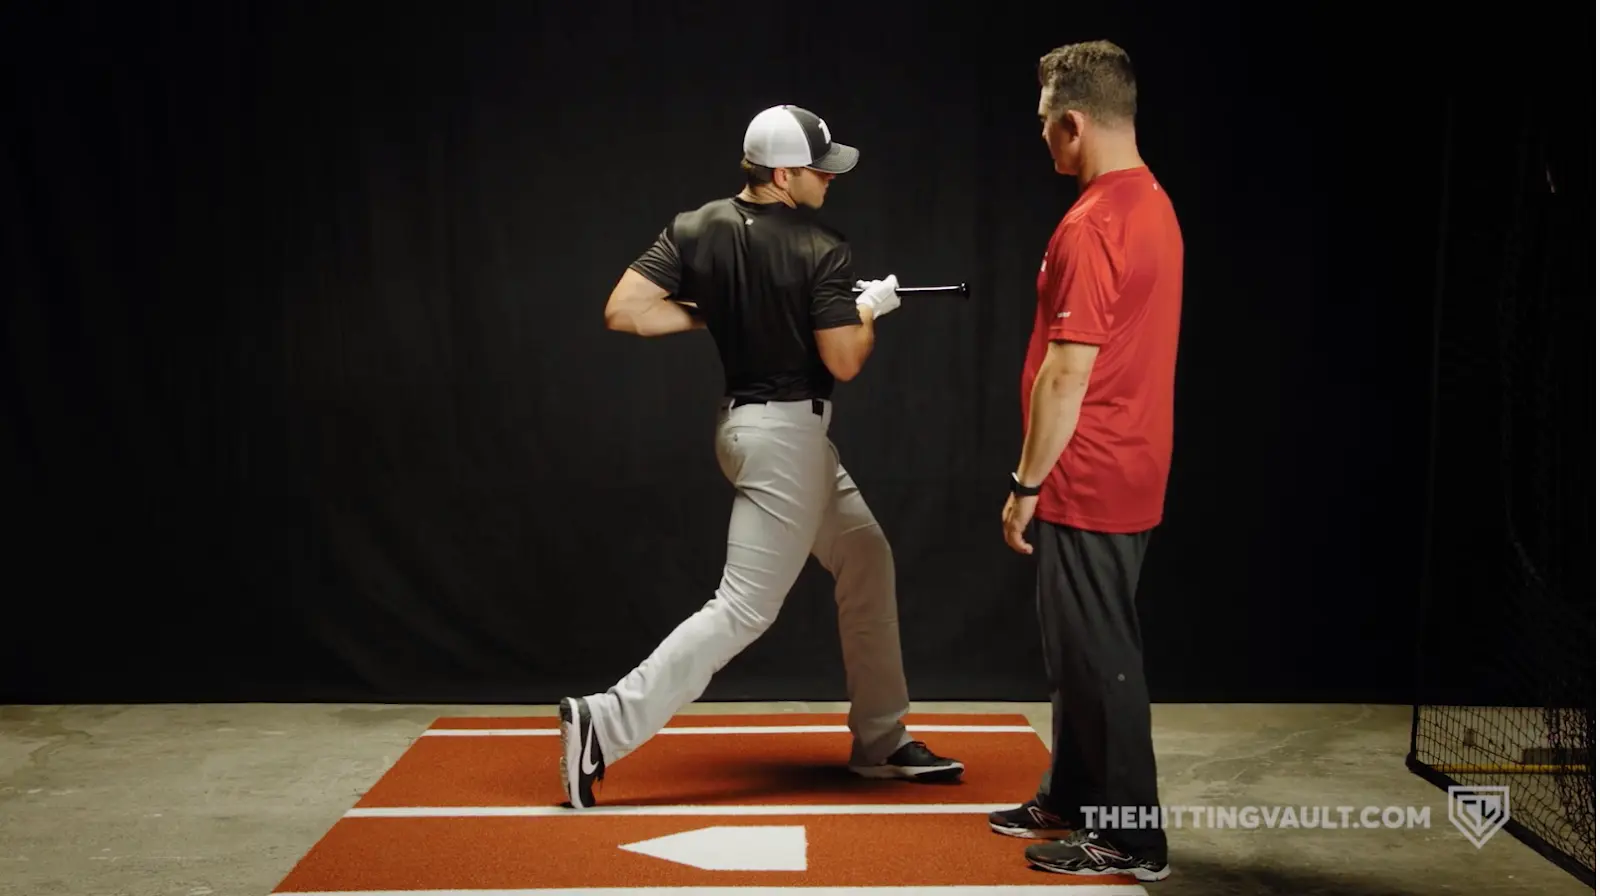
Full Turns Drill
This drill builds on the Separation Drill (above), and also integrates the last phase of the swing. The Full Turns Drill teaches hitters the proper hip and torso rotation. This is an easy drill that all hitters can utilize during their careers.
Hitters will set up with a bat barred across their chest, and will then stride and “swing.”
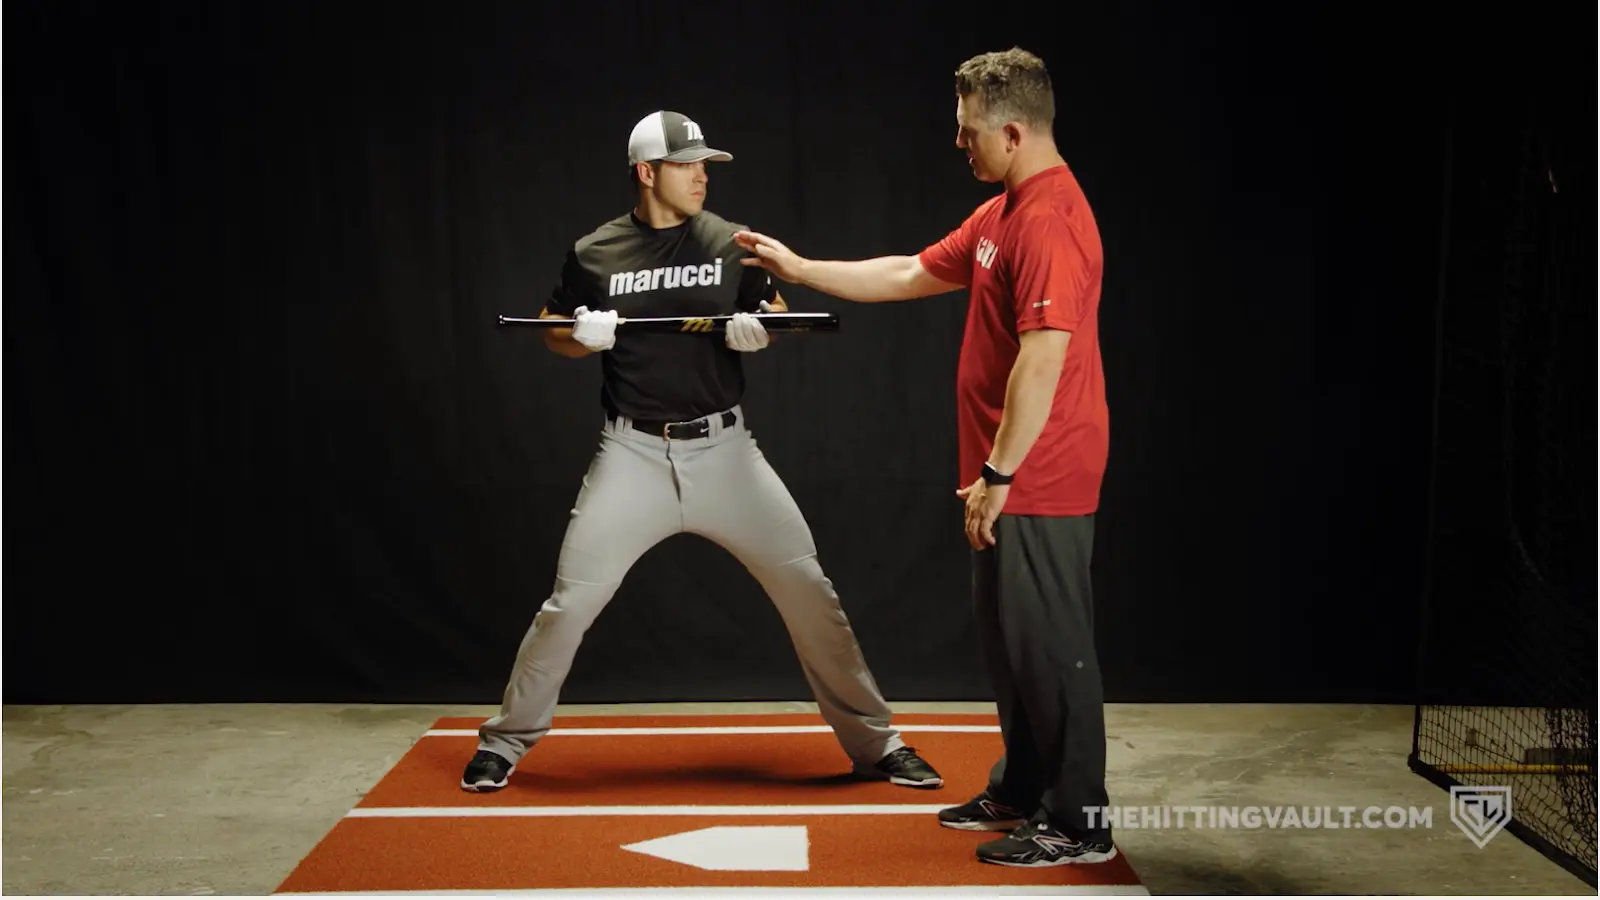
The “swing” should look just like a real swing, except that the hands are taken out of the equation since the bat is barred across the chest. The finish position should have the knob of the bat pointed to the pitcher, with the hitter’s back facing home plate.
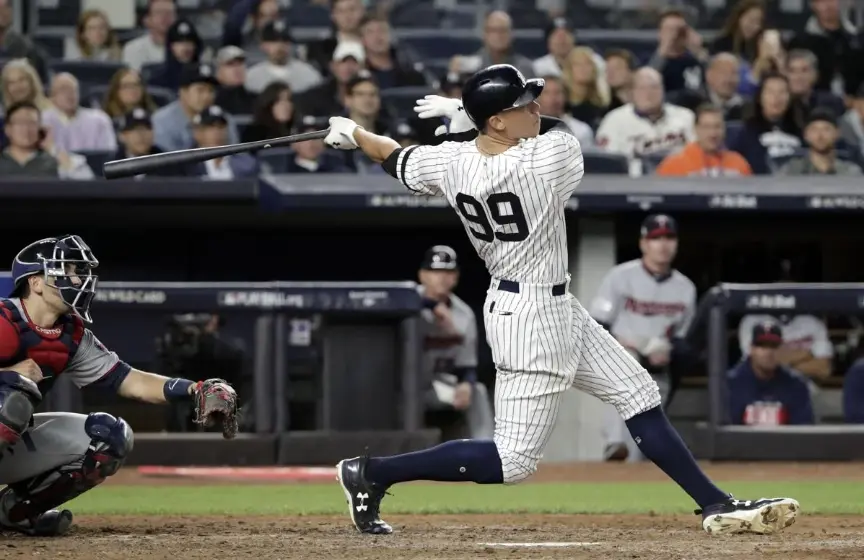
The best players in baseball and softball have the ability to finish their swing and rotate around their torso like this. One of these players is a perennial American League MVP candidate, and the other is a recent top prospect call-up. Aaron Judge (left) has eight inches of height on Michael Chavis (right), but both show tremendous ability to rotate and drive the baseball with power.
Keep in mind that a hitter will not have their back facing home plate at the end of every swing. That’s especially true on pitches where the hitter is late, and occasionally on an outside pitch. But with that in mind, we want to practice having that full movement and mobility to make sure we’re not consistently cutting off our hip rotation.
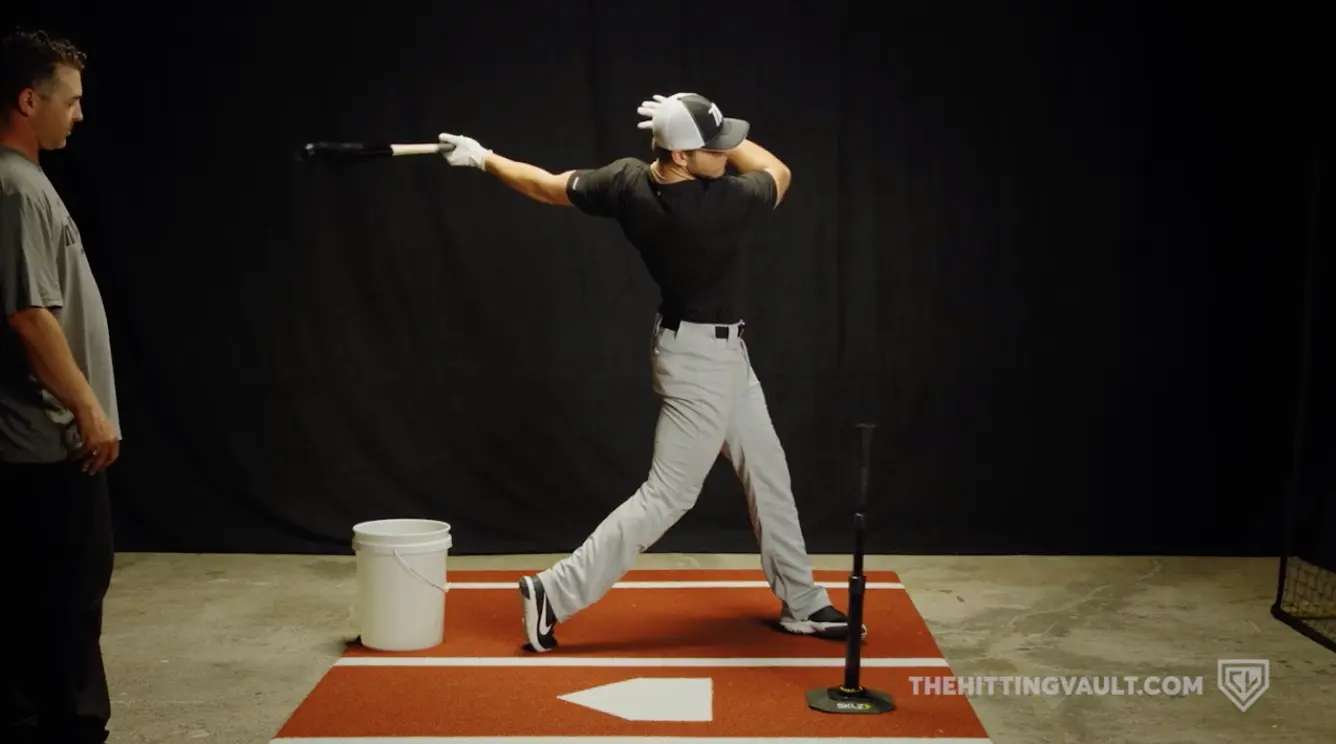
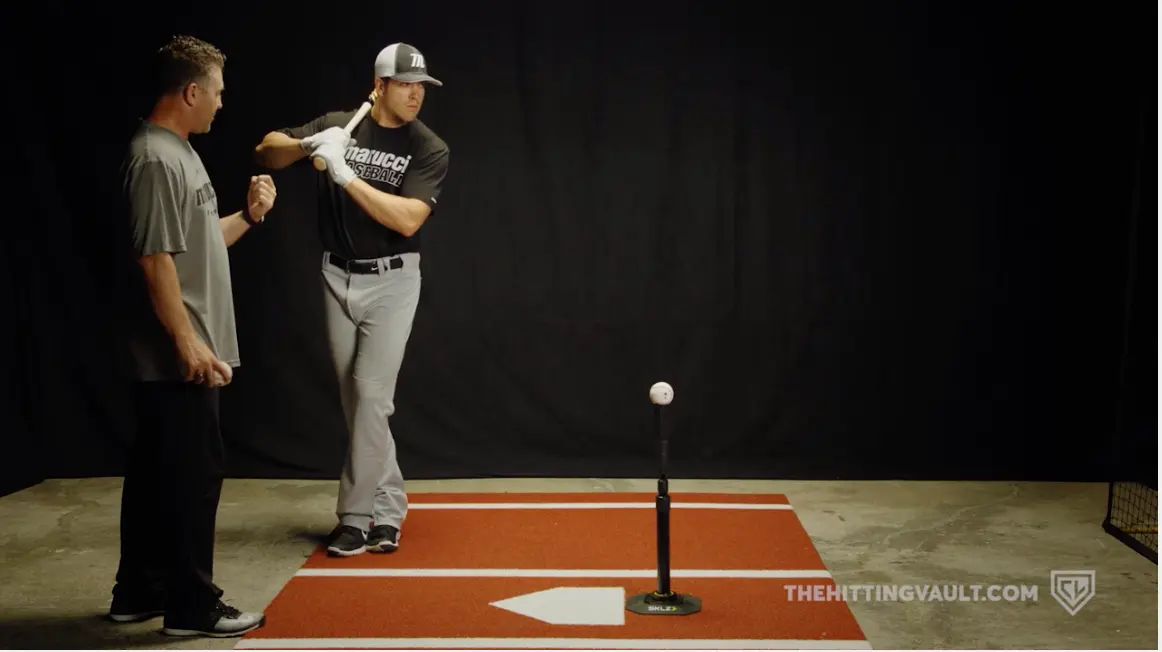
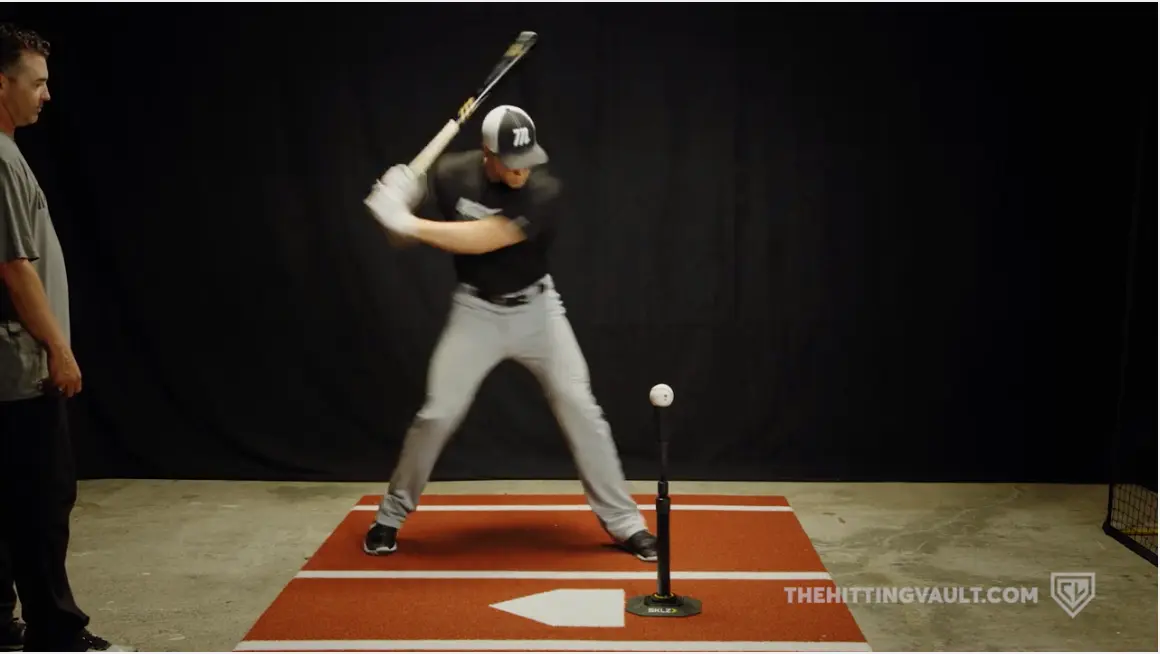
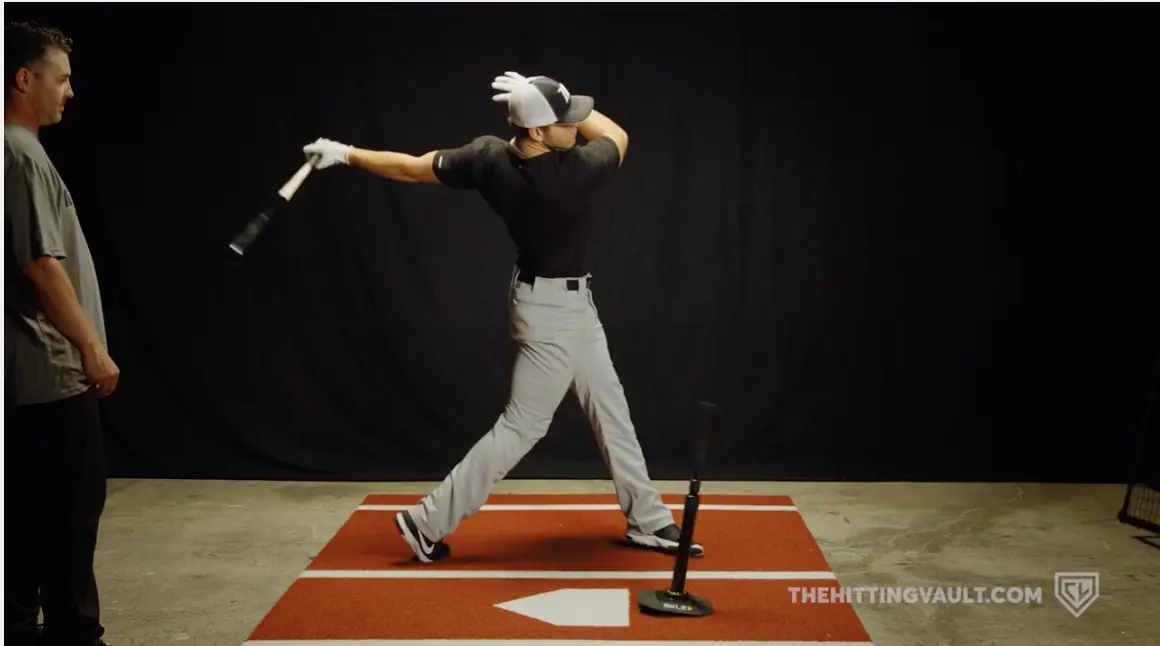
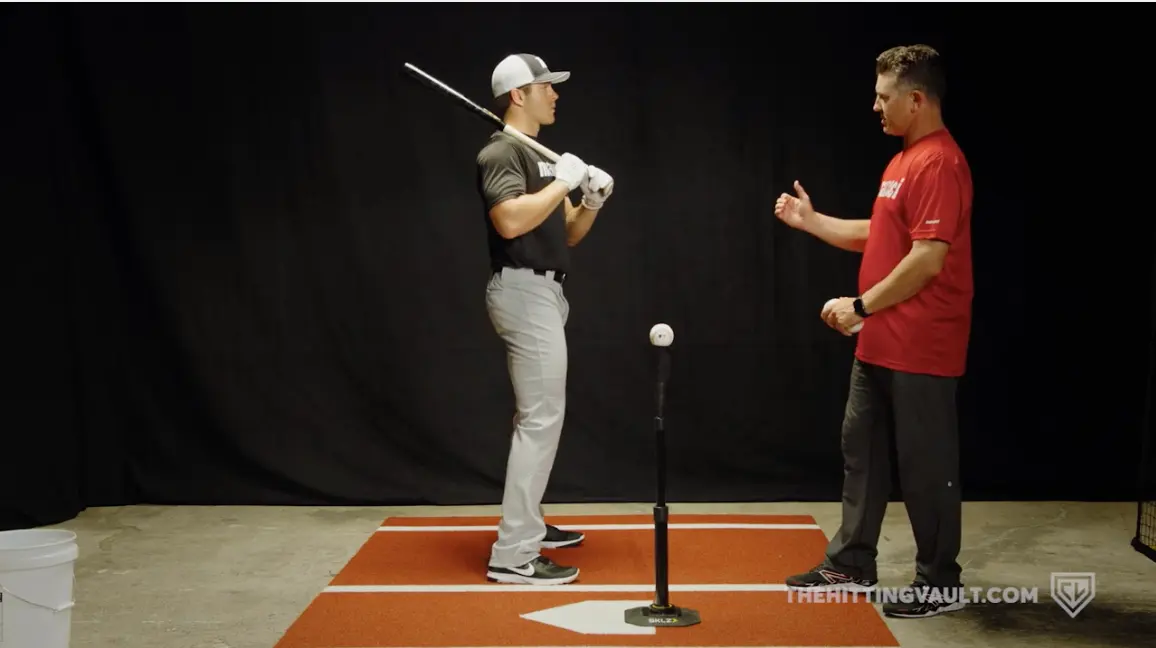
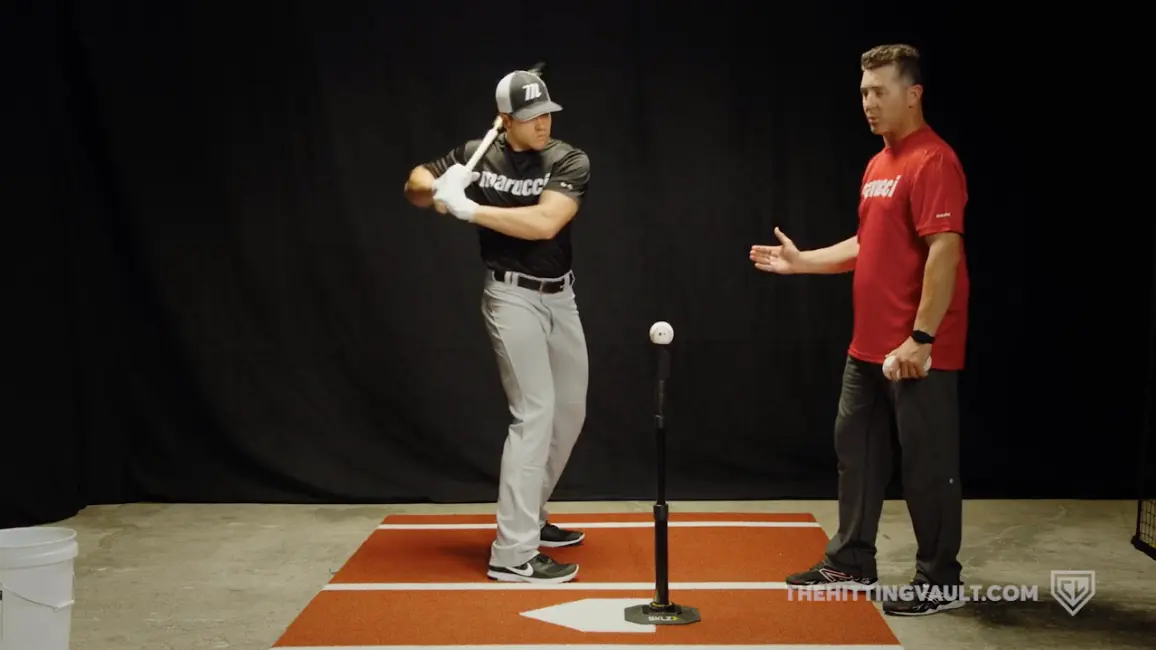
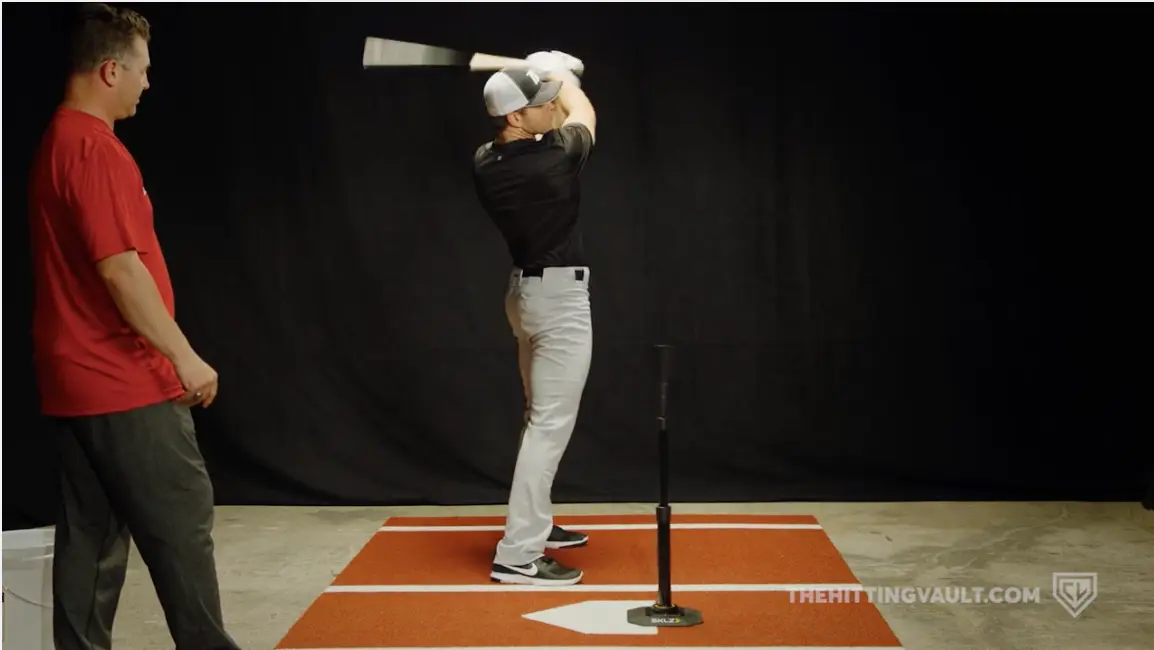
Hitting Station #2: Tee Drills
Rock the Baby Drill
This drill will help teach rhythm, timing and proper shoulder movement to the ball. When performed correctly, this drill will help hitters prevent themselves from wrapping the bat around their head, and instead teach the correct movement of the shoulders.
There’s a right way and a wrong way to do this drill. Here’s what the right way looks like in the rocking portion of the drill: Coach Peterson’s shoulders are working together and the knob of the bat is moving from catcher to pitcher.
If you catch your hitters locking their arms or rotating around their torso, step in. These movements, as illustrated below, are incorrect.
So, rock back and forth three to four times to really feel the movement of the shoulders, then bring the bat up, load, stride and swing.
From the loaded position, finish the swing. As soon as the rocking part of the drill has been completed, the hitter should be able to go from their load and stride to finishing the swing.

Don’t Squish the Bug
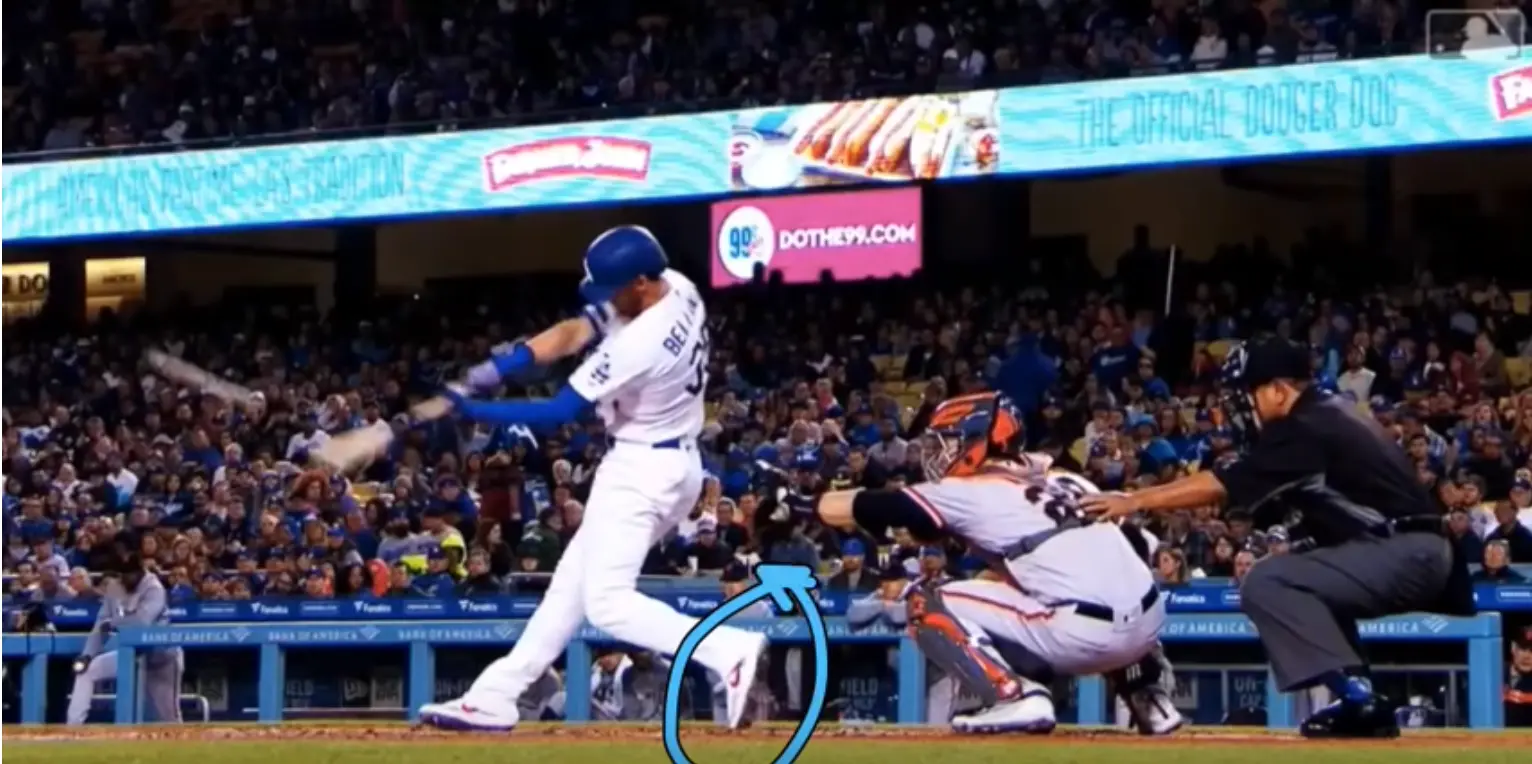
A common misconception is that hitters have to “squish the bug” to create power. Well, that’s not true. Hitters create power by having separation, a good sequence, and hip rotation like we talked about earlier. When the hips are rotating hard into a firm front knee, the back foot should become weightless at or before contact. Typically, we see a hitter’s back foot actually lose contact with the ground and/or move forward.
The Don’t Squish the Bug Drill forces hitters to have their back foot become weightless instead of just spinning on the ball of their foot.
Have the hitter start in their stance with a bucket of baseballs up against their back foot. The hitter will then load into their back hip and stride. In the picture below, notice how the hitter is maintaining his posture and keeping his knee inside his back foot, so that he’s ready to move forward.
From here, the hitter strides forward and fires his lower half to the ball while shifting his momentum into his front leg. His body weight remains central to his stride length. He rotates his back foot without touching the bucket, creating positive movement with the back foot (not his head, which stays still after launch position).
At contact, the hitter’s hands are in a good palm up/palm down position. He has good rotation as his hips are facing the pitcher. He crushed that ball.
Cody Bellinger, who is absolutely on fire for the Los Angeles Dodgers, does this extremely well. Note how his foot is off the ground at the point of contact.
Crossover Drill
The final drill of the batting tee station is the Crossover Drill, which helps hitters keep their back side from collapsing during the swing. This drill also helps with creating positive movement forward to the baseball (and with generating power).
To start, begin the drill with the hitter’s front foot crossed over the back foot (as shown in the picture below). From this position, the hitter will step/fall forward into launch position. As the foot moves forward, the hands and shoulders stay back. The goal is to maintain the tension and separation that should be created, so don’t allow the hitter to start taking his or her hands to the ball until after launch position.
The hitter will land in launch position and explode through the baseball.
The important part is nailing the landing from the crossed position. Working from that position gives the hitter the ability to have their body work on the plane of the pitch the right way with power.
Hitting Station #3: Front Toss
Seeing the baseball is just as important as the mechanics of hitting it. If you can’t see and track the ball, how are you supposed to hit it? As players move up in skill level and the pitching gets better, this skill becomes more and more important.
Track and Catch Drill
While it’s a myth that you actually see the ball hit the bat at contact, it’s still important to pick the ball up from the release point to the hitting zone. This is a good drill that should be done at the beginning of front toss since it helps with tracking and promotes proper torso movement.
This drill is simple. Have your hitters stand in the box in their stance. They’ll load, stride and pretend to swing at the ball. Instead of hitting it, they’ll catch it. This is a simple yet effective way to work on tracking, and to ensure the hitter isn’t pulling his or her head out.
Pulling the front shoulder, or pulling your head out, is caused by not having the correct torso tilt or hip hinge in the swing. Focus on keeping the tilt during the drill. As hitters improve, you can shuffle locations, moving the ball inside, up, down, etc.
TIP: for elite players and hitters, mix up your grips and have them tell you if the pitch was a four-seam or two-seam. You can also tell them to only catch strikes, which can help build a stronger sense of the strike zone.
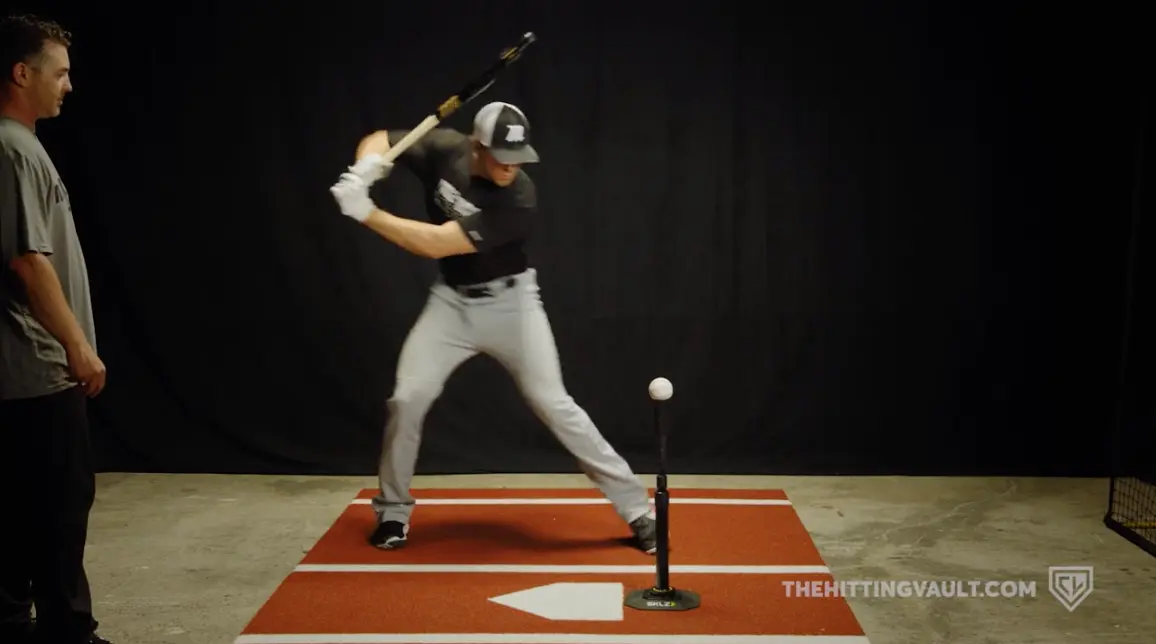
Get On-Plane Drill
This one is at the foundation of hitting. If you can’t get on-plane and stay on-plane, it’s going to be extremely hard to hit the ball for power (and you won’t have very much room for error). We see a lot of players struggle with pulling off early or getting on-plane too late, resulting in weakly-hit balls.
This drill is normally done off a batting tee. But it also works with front toss, where it can be used to develop even more rhythm and timing.
The hitter will start square to the pitcher with the bat on his or her shoulder. The first movement will be to get the upper part of the body into a loaded position while keeping the lower half facing the pitcher.
See how the hitter has his lower half still facing the pitcher? This is the “starting position” for this drill. From that position, the hitter will swing the bat. Starting this way forces the bat onto the correct plane.
Notice how the hitter is maintaining his torso tilt, just like in the Track and Catch Drill described above. Aside from bat control, this drill also helps with learning the right sequence, since we’re forcing the hitter to have their hips starting ahead of their hands.

Finally, the hitter finishes with good extension to the pitcher and his back rotated to where he started. This drill may be awkward and uncomfortable at first, but after a few reps players should be able to get the hang of it.
After these two drills, get some regular swings in off front toss. However, don’t just take wasteful hacks with no intent to do damage. Make sure hitters are swinging only at pitches in the strike zone, and taking all the balls. We want to create as much of a game-like scenario as possible.
Hitting Station #4: Live Pitching
Ideally, if you have pitchers that are able to throw live, that’s the best option for your hitters. The more live reps they get, the better. And honestly, it helps pitchers also get game-like reps in. If that’s not available, then the next-best option is to have a coach throw. If that doesn’t work, a pitching machine will also satisfy what the players need here. (Live-arm reps are always preferable to those that come off a pitching machine.)
Related reading: Machine Pitching vs. Front Toss
Remember, as we mentioned earlier, this is the time for players to get their live defensive reps (especially outfielders). Getting live reads off of bats in BP is about as close as they’ll get to game speed reps during practice, so clear out your pitchers and let the outfielders chase down baseballs.
Round 1: Swing Away
This is the chance for hitters to get repetitions and drive the ball all over the field. You can have your hitters take two rounds of five or one round of 8-12 swings. It’s ultimately up to the coach to determine how many repetitions hitters need. Time permitting, the defense can play out grounders and flies. To get a better idea of how many cuts eat player needs, check out our article on how many reps hitters should be taking.
Round 2: Do Your Job
Having the ability to execute a bunt or a hit and run makes the difference between good and great teams. During this round, players should get down three bunts, execute two hit and runs, one “get him over,” and drive the runner in twice.
Let’s break it down:
- 2 sacrifice bunts: one left, one right.
- 1 suicide squeeze: make sure hitters don’t show early.
- 2 hit and runs: swing, unless the pitch is just insane.
- 1 get ‘em over: hit to center or the right side to advance the runner from second to third.
- 2 get ‘em in: Drive two baseballs. There’s a runner on third and he or she needs to score. Do whatever it takes.
Competition Round
In our softball drills and practice plan article, we have a competition round that, with a few adjustments for outs and team size, is also a great way to end a baseball practice on a high note.
Another competition is the age-old “hit the screen” game. Divide the team into two equally-skilled teams. Hitters will cycle through, getting one chance to hit a line drive off the L-screen. For it to count as a line drive, that means the ball has to hit at least halfway up the L-screen.
Whenever a player hits the L-screen, his or her team is awarded one point. The team with the most points at the end of three rounds wins, and the losing team has to pick up the field. This game is a great way to finish practise because it allows for a fun, competitive atmosphere that also works on line drive skills.

The Hitting Vault is the most popular, most trusted and highest-rated online hitting community.
It was created to teach athletes how to move their body to unlock their most powerful swing. It’s designed to help coaches get optimal results from their athletes. Join and get access to over 100+ exclusive videos for members and step-by-step instruction so you’ll know exactly what to do next to unlock your power at the plate.