Softball Drills and Practice Plans
Table of Contents
As a softball coach, you probably spend a good amount of time putting together specific softball drills and practice plans. The biggest piece of advice we can give is to take the same game mentality into practice. Practice can get dry, monotonous, and players can lose focus. As a coach, we always want to focus on how we can structure practice in a way that enables us to talk less and do more.
With an added focus on competition, intensity, and station rotation, your softball practice can bring the game speed and intensity to help develop your team. As coaches, at the end of the day, our job is to help make a difference for our athletes. The softball practice plan below is a great blueprint for all levels of softball to improve your team.
A Tale of Two Halves
This practice will be designed to take two hours, about the first half of your practice should be focused on defense. The remainder of the practice should be focused on offense and competition. Getting the fundamentals down and executing on defense will help you win games. Giving away outs will ultimately cost you games.
Softball Drills and Practice Plan: Defense
After warming up, doing band work to stabilize the shoulder, and throwing, start to integrate a few drills for your infielders to help their hands. It’s important to start doing bands around age 11 or 12 to make sure the shoulder and back muscles stay balanced to prevent injury later on.
The first is a set of three drills to work short hop abilities. Here we’ll have both players on their knees throwing short hops to the other.
Short Hops Barehanded (5 min)
Trains the hands to be soft and for the player to get a good feel of the motion through the ball and playing the ball, instead of the ball playing her. Her fingers should be pointed down and her wrist slightly cocked back, starting with the arm closer to the body and working through the softball.
- Facing each other, down the middle x5
- Turn body 90 degrees, backhand x5
- Turn body the other way, forehand x5
Once both players have completed 5 reps working forehand, straight on, and back hand, have them stand up and repeat the same sequence still without a glove, with their feet working “right, left, field.” Arms should have bend, knees bent, and hinging at the hip. The final sequence will be with a glove. These simple drills should become a staple in your warm up routine. Time permitting, increase the number of reps. Encourage them to do this at home against a wall with a tennis ball to improve on their skills.
Infield/Outfield (15-20 min)
Another staple in both baseball and softball is getting reps and throws from all positions and to all bases always. This helps increase arm strength as well as getting reads in the outfield and reps in the infield.
Outfield
- Two throws to second from Left, Center, Right
- Two throws to third from Left, Center, Right
- Two throws to home from Left, Center, Right
- The first throw should be focused on throwing through the cutoff, if it gets cut, it gets cut.
- The second throw to home is a “do or die” play, where the outfielder is throwing out the winning run, get it there, the cutoff should not touch this ball at all.
- Now that the outfielders have had their reps throwing to bases and fielding ground balls and fly balls, line them up in center and (depending which dugout you’re in) have a coach hit more fly balls and ground balls to the outfielders from the foul line working on coming through the ball and getting into a good throwing position.
Infield
Moving around the infield, hit ground balls to third, short, second, then first. If there’s any way to you could have two coaches hitting ground balls that would be best!
- 3B, SS, 2B all make the throws to first, 1B makes the throw to third.
- Do this twice, challenge your infielders, move them to the glove side and to the back hand.
- Two double plays, again moving the fielders around and testing their range. The first baseman will make the throw to second and try to get back to the base.
- Two balls with the infield in:
- The first one, players will check the runners and throw to first, THEY MUST LOOK AT THIRD to freeze the imaginary runner
- The second one, throw to the plate to get the runner on a TAG play, keep throws chest height or below and quick transitions from receiving to throwing to the plate. Let the catcher decide which one they want to have come home or go to first base. By having them yell, “check her, go 1,” or “4, 4, 4!”
- Long/Short
- Move all infielders back behind the baseline about 6 feet throw to first (1b makes the throw home), and roll them a slow roller so they can make the throw to first on the run. One regular throw, one short throw on the move.
The key to a good infield outfield is energy. The team needs to be loud and communicating every single play and rep. In practice, before games, this sets the tone for how you play. Nothing gets the team more fired up than a good infield-outfield and nothing is more intimidating than a loud and clean infield-outfield before a game.
Pitchers are People too
Pitchers should have gone through a throwing regiment or specific plans that your coach has for the staff.
Competitive pitches are incredibly important. As the season approaches (and in season) the pitchers should be getting used to throwing to a batter in the box. This will increase confidence in pitches such as the backdoor curve or changeup. Pitchers can get a feel for how much their pitches break with a batter just standing in the box. On the flip side, as a hitter, there is no better drill for teaching pitch recognition than standing in on your pitcher’s bullpen sessions.
Ages 10 and Under
For youth softball hitters, have them stand 2 feet from home plate so the have enough time to get out of the way if they need to. Have the hitter say yes or no as soon as they know whether they would swing or not. This helps the hitter and the pitcher!
Ages 10 and Over
The hitter should stand where they normally do in the box, with their normal hitting stance, and pretend they are holding a bat by interlocking their top hand pinky with their bottom hand pointer finger. As they get more comfortable, hitters can actually simulate a live at bat. “Swinging” and “taking” balls and strikes. “Swinging” will obviously feel different because there isn’t a bat in their hand since their fingers are interlocked, but it is still a great way to give feedback to the hitter, work on their timing and help the pitcher out. The pitcher is able to see what a real hitter would in fact swing at or what they would watch go by. If the hitter does not feel safe, she can throw on a glove and just catch it if it comes close to hitting her.
We recommend that all pitchers have a Spin Right Spinner. Using a spinner teaches a pitcher the right way to throw different pitches: Rise ball, curve, screw, change etc. and is a great tool to use every day when they’re warming up. Because of the shape of the spinner, it gives immediate feedback to the pitcher and catcher if the spin is correct. It takes lots of practice to get it to spin correctly for each pitch, but will definitely help promote the correct tight spin that you want regardless of whether you are a power pitcher or a junk ball pitcher. This video from Sports Science shows just how effective and how tough it can be to hit pitchers who spin it.
21 outs (20-25 min)
This softball practice drill is where the practice is going to start to become competitive. Option #1 is for an elite team, option #2 is for intermediate, and #3 is for younger teams or teams that struggle a lot with making routine plays.
Option #1
Send out your starting 9, yes, put your pitcher on the mound as well. Here the purpose is to go 21 consecutive outs without making an error. If an error is made, you restart at 0. Players should feel pressure as the outs climb, and this is good.
Whoever is not in the field will be running to simulate game speed. The more reps at game speed you take the better, it creates a competitive environment and helps both the players in the field and the players running.
Integrate everyone in the field, hit balls into the gaps, put runners on. Make sure your players are communicating where the ball is going and what the situation is. After every three outs clear the bases and change up the players in the field when you feel it is necessary. If they make an error, reset the outs to 0, 5 burpees, and right back at it. Do this until all 21 outs are recorded without an error made. For time purposes you can shorten it to 11 outs prior to starting.
Option #2
Have everyone go to their primary or secondary position, making each spot close to even. For example, don’t have 4 people in left field while there’s only 1 in center and 1 in right. Balls will be hit directly at players as routine plays, in no particular order and include pop ups, line drives, ground balls, and bunts. EVERY ball must be thrown to second base, then to first base and then home to the catcher. The purpose it to have the least amount of errors until they get to 21 outs. For every ball that is fielded cleaning, thrown to second, then first, then the catcher without dropping the ball, adds a 1 point.
Every error, they will drop down to 0. Ex: You’re at 18, and a ball is overthrown, start over at 0. If a ball is hit that is not routine and they don’t make the play, they should finish out the play and then stay at the same number, not increase or decrease.
The goal is to create a competitive atmosphere, that will improve their defense, but at the same time building confidence. Keep track how long it takes for them to get to 21 outs and celebrate when they decrease their time! If needed you can shorten it to 11 outs.
Option #3
Have everyone go to their primary or secondary position, making each spot close to even. For example, don’t have 4 people in left field while there’s only 1 in center and 1 in right. Balls will be hit directly at players in no particular order and include pop ups, line drives, ground balls, and bunts. EVERY ball must be thrown to second base, then to first base and then home to the catcher.
The purpose it to have the least amount of errors until they get to 21 outs. For every ball that is fielded cleaning, thrown to second, then first, then the catcher without dropping the ball, adds a 1 point. Every error, they will drop that number down 2 numbers. Ex: Start out with 0. Ball hit to short, fielded cleanly, and throws are good= 1. If they bobble it, they drop down to -2. Have another coach keep track of how many errors they had until they reach 21. If a ball is hit that is not routine and they don’t make the play, they should finish out the play and then stay at the same number, not increase or decrease.
The goal is to create a competitive atmosphere, that will improve their defense, but at the same time building confidence and helping your players develop a love for the game. Keep track of the final number each week and celebrate when they improve that number! If needed you can shorten it to 11 outs.
Softball Drills and Practice Plan: Offense
The atmosphere:
This is where your practice needs to be run with precision and intensity. The team needs to lock in during the hitting segment of practice because it gives infielders and outfielders live game reads – something you can’t give with a fungo – and it gives baserunners a chance to get reads as well. Feel free to switch up whether you have defense or offense first on the day. Keeps things interesting!
Hitting stations and rotation is going to keep the first part of this section alive and effective. Quality over quantity is important in these hitting drills because you don’t want to have your hitters tire themselves out and take meaningless swings, you want your hitters to take swings that will make them better.
Find a speaker and get to work. Here’s a playlist from FloSoftball that will keep the energy up. Also, here are a few options for portable speakers.
And trust us, your players will love you for it! If you’re not tech savvy, one of your players is bound to have a smartphone, and already know how to hook it up via bluetooth as long as it’s charged. If you have really little kids, then figure out how to use your phone or a parent/coach’s phone.
Softball Hitting Drills for Practice
At The Hitting Vault, we believe that there should be at least four stations that you rotate through to run an effective softball hitting practice. This eliminates players from standing around and helps make the most of the short time you have available at practice.
One key thing to remember for any softball hitting practice is that quality always trumps quantity. Quality reps and swing movements in batting practice are much more important than hundreds of meaningless swings.
The softball practice plan that you’ll see below incorporates four separate stations, focusing on the tee, front toss and live pitching.
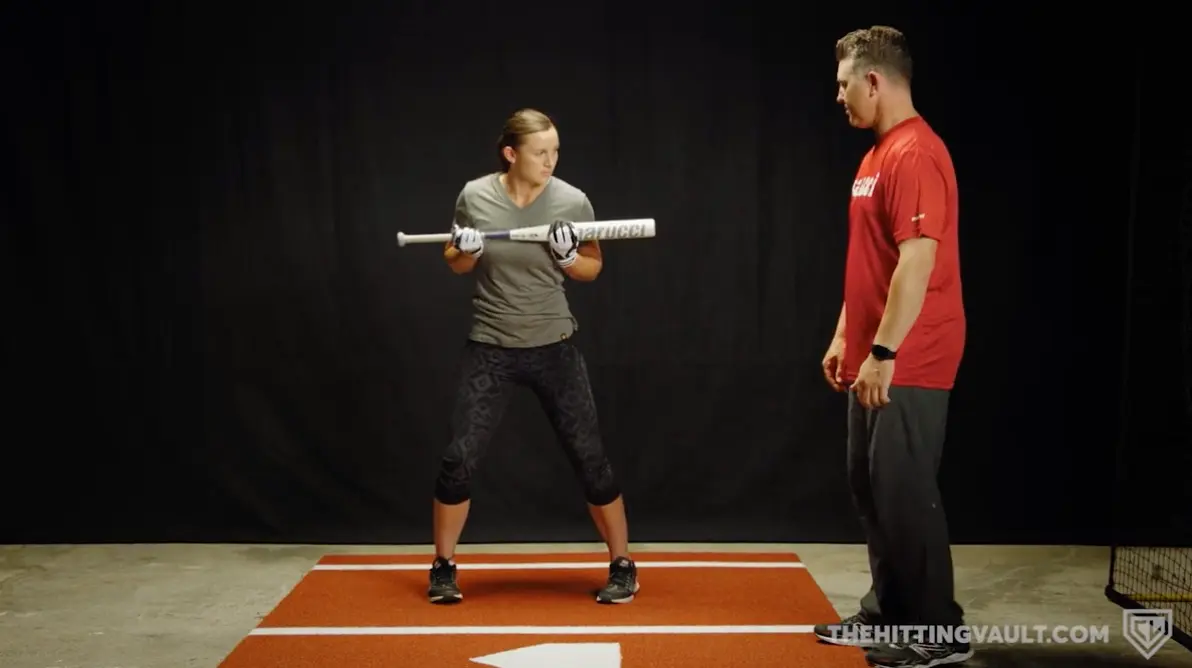
Station One: Movement Station
Hitting a softball with power comes from the bottom up. Having a strong lower half that stems from good rotation and weight transfer, will help you develop power — regardless of your size. When we say hitting for power we don’t necessarily mean hitting the softball 350 feet, or hitting for the home run cycle like Arkansas’ Danielle Gibson. What we mean is regardless of how big of a hitter you are, with the correct body movements, hitters should be able to hit the ball hard, in the gaps, and off the wall, if not over it!
Related reading: Practice Focus, Body Movements or Actual Hitting?
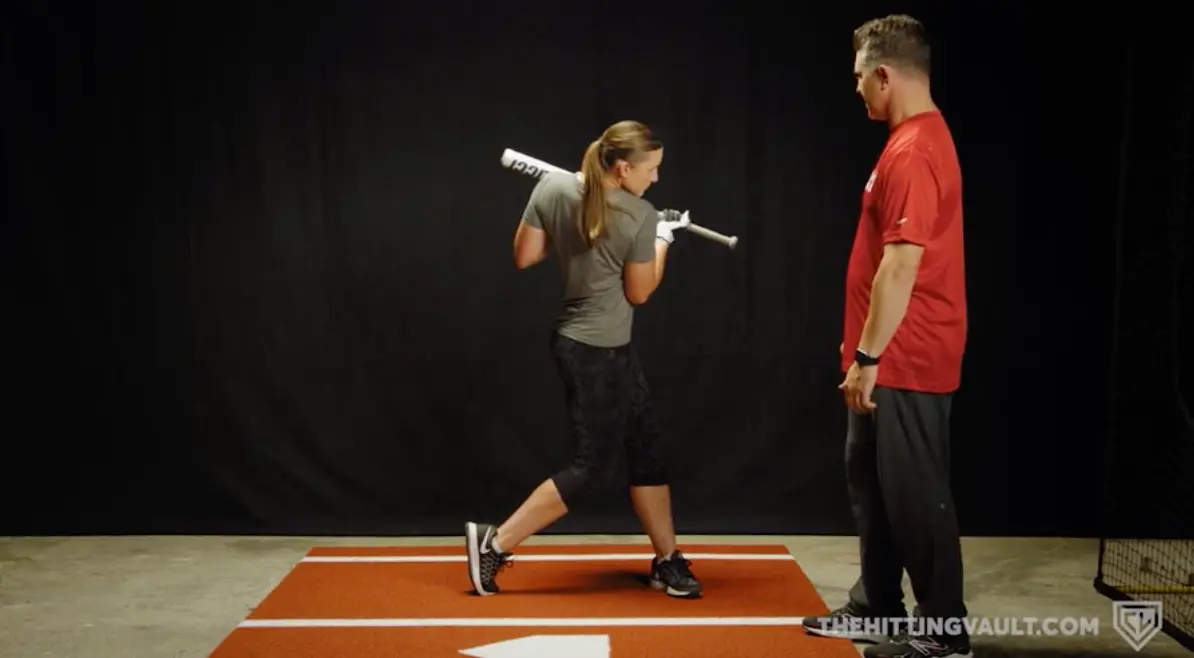
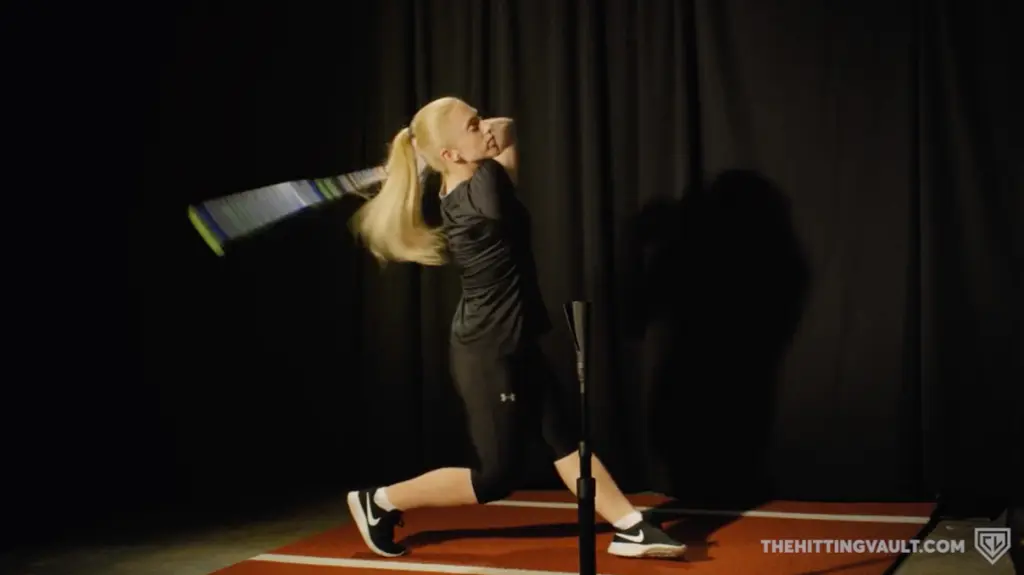
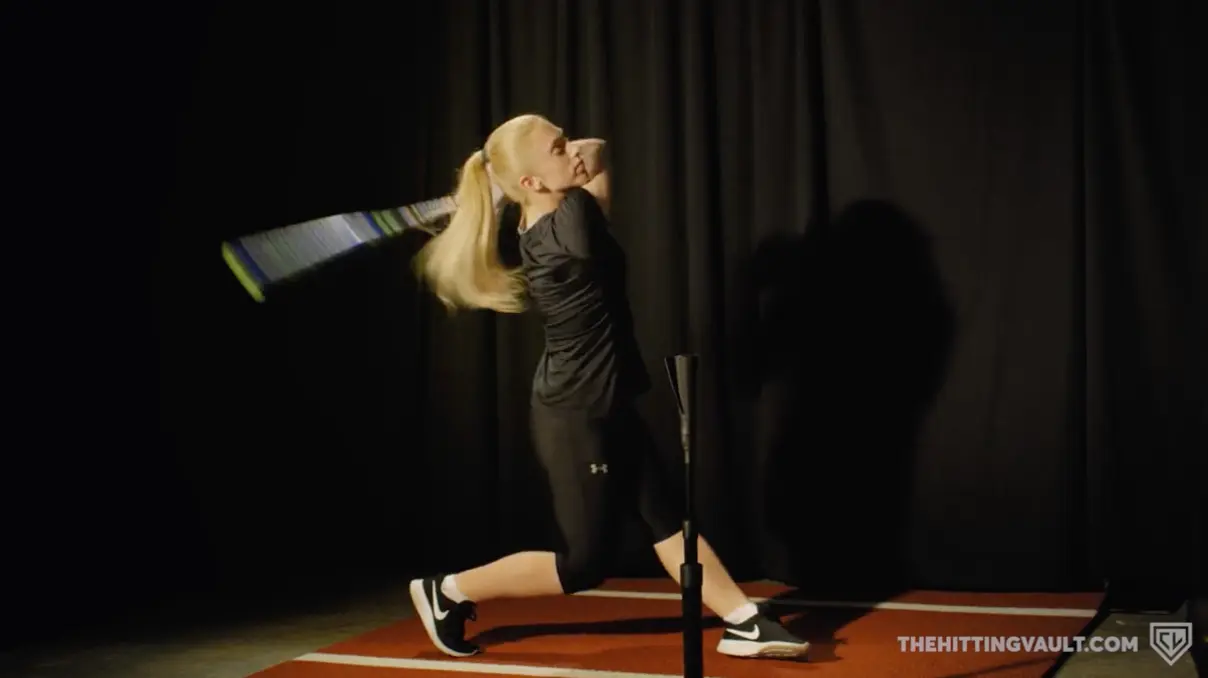
Separation Drill
The separation drill adds the feeling of hip and shoulder separation, which is key for hitting a softball with power.
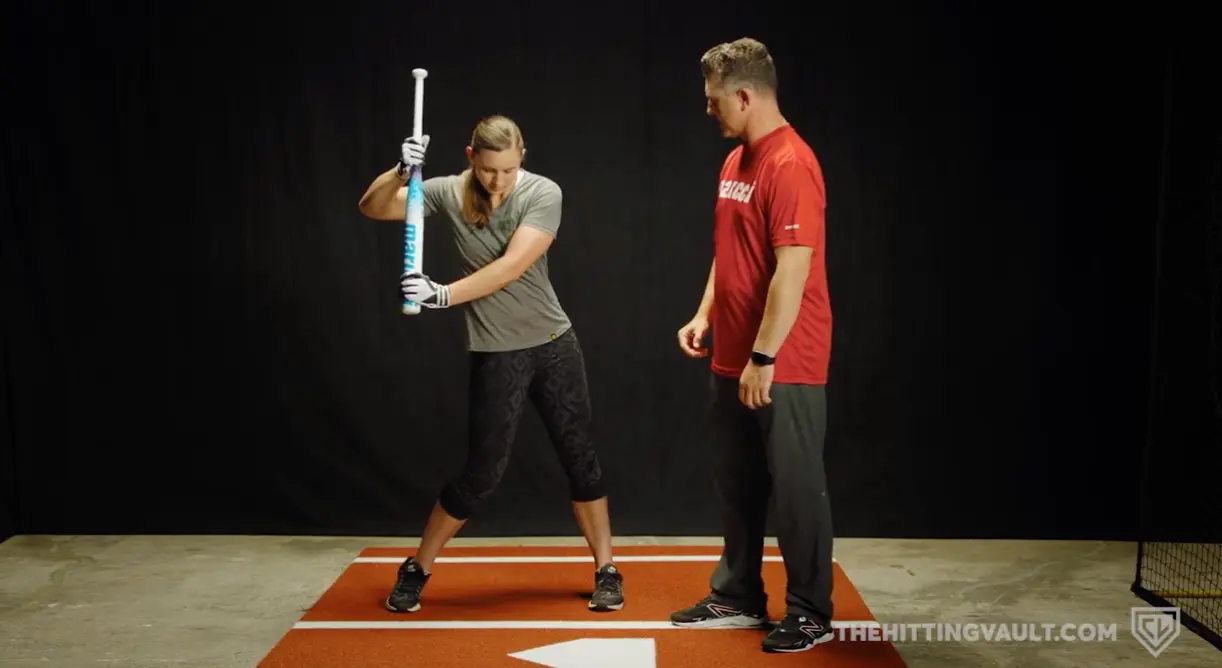
Notice how Coach Alexa Peterson’s shoulders have not moved, yet her hips have rotated to the pitcher, this creates separation in the swing and generates power.
Full Turns Drill
One of the hardest things in sports to do is to hit a softball with power, yet the movements that compose a powerful softball swing can be simple. The Full Turns drill is simple, yet incredibly effective.The purpose of the full turn drill is to activate the core and strength in your lower half to produce stronger and more aggressive turns through the swing.
There are 3 progressions for this drill:
- Pause in launch position, then complete the movement
- No pausing, full movement
- No pause, full movement off front toss

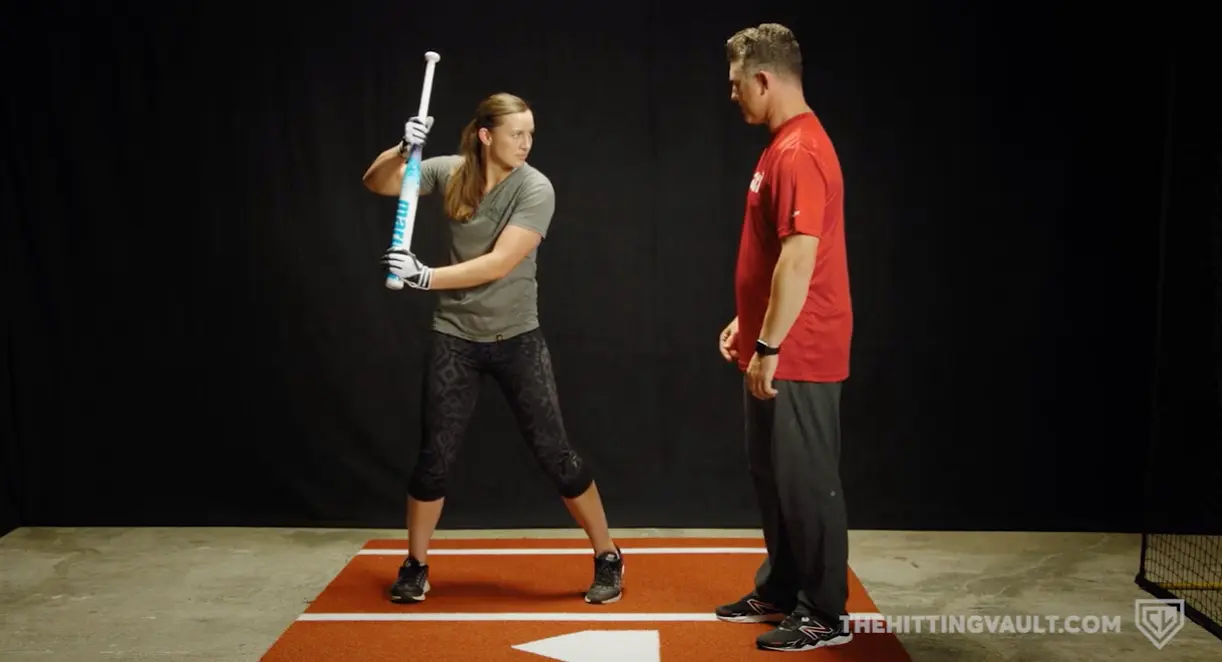
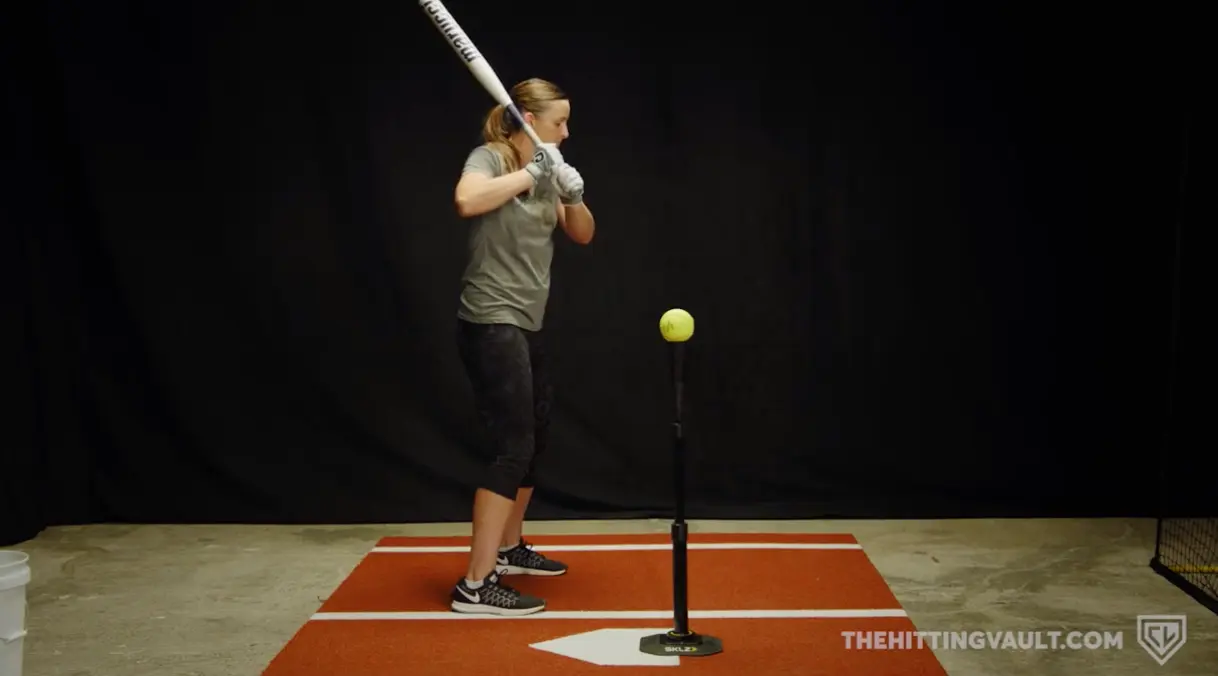
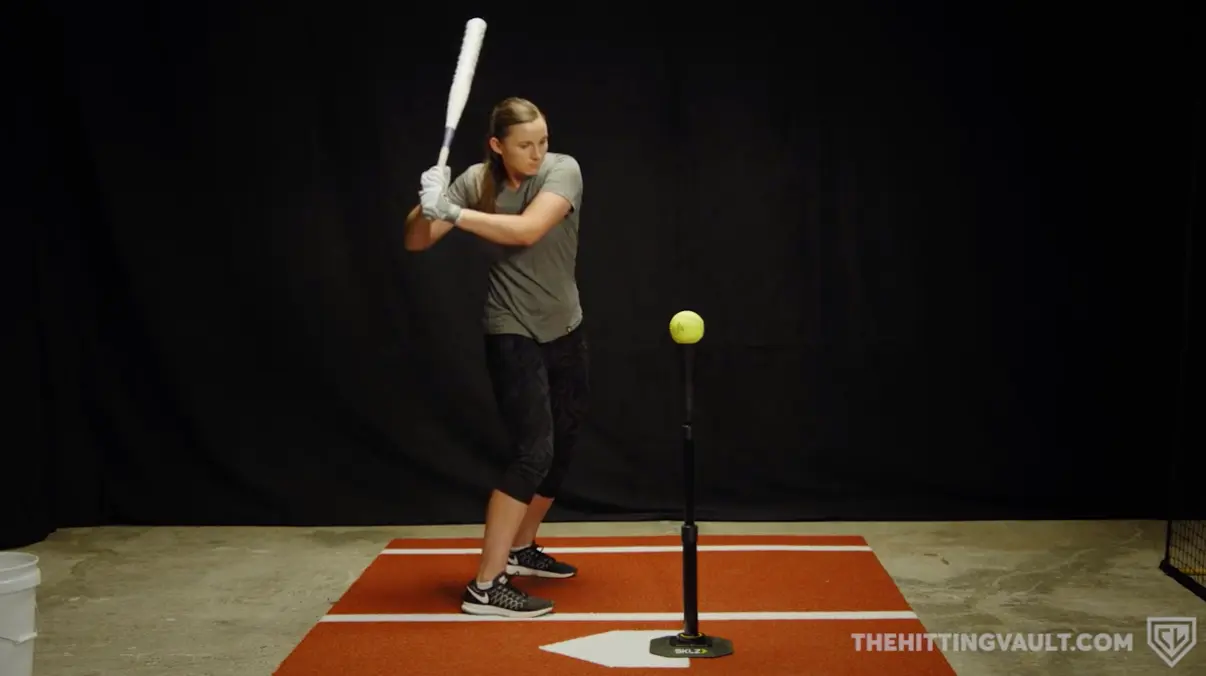
Station Two: Tee Drills
Crossover Drill
The crossover drill is an excellent way to work momentum going forward and through the ball while accentuating a great K posture. This will help hitters that collapse their backside and have a hard time maintaining their balance throughout the swing. By starting in this cross over position it integrates a controlled fall as well, feeling the body moving towards the tee.


Slow to Fast Drill
The slow to fast drill helps develop good rhythm in hitters. Often times we find hitters getting impatient and striding too quickly, too aggressively or just out of control. Slow to fast is also commonly referred to as slow to explode, and even helped this MLB hitter go from 14 home runs to 50 by adopting this concept.
To do this drill you want your hitters to focus on being slow and in control until they reach a good launch position, and then explode full speed and finish their swing.
-

- Slow…

-

- Slow…
-
- Fast!!!
The slow to fast drill helps hitters feel the load into their back hip and have the ability to control their stride and explode. With this control in their swing movements, hitters can often increase their bat speed as well by simply adopting this mentality and rhythm of slow to fast.
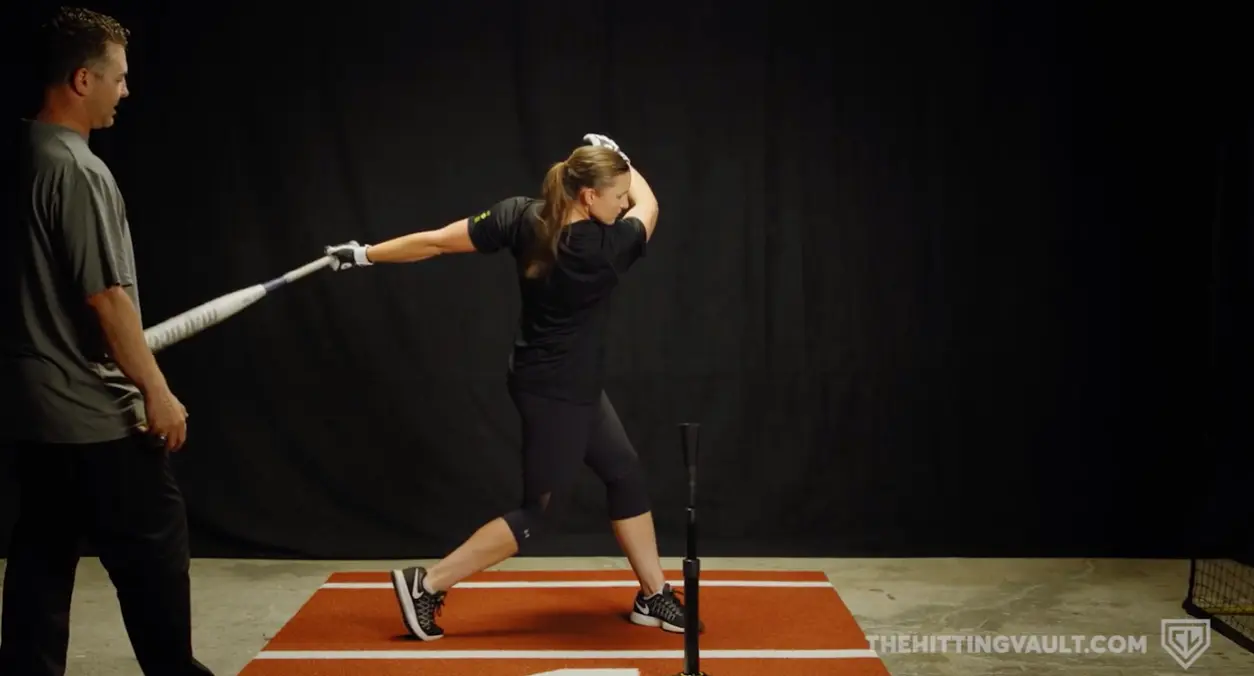
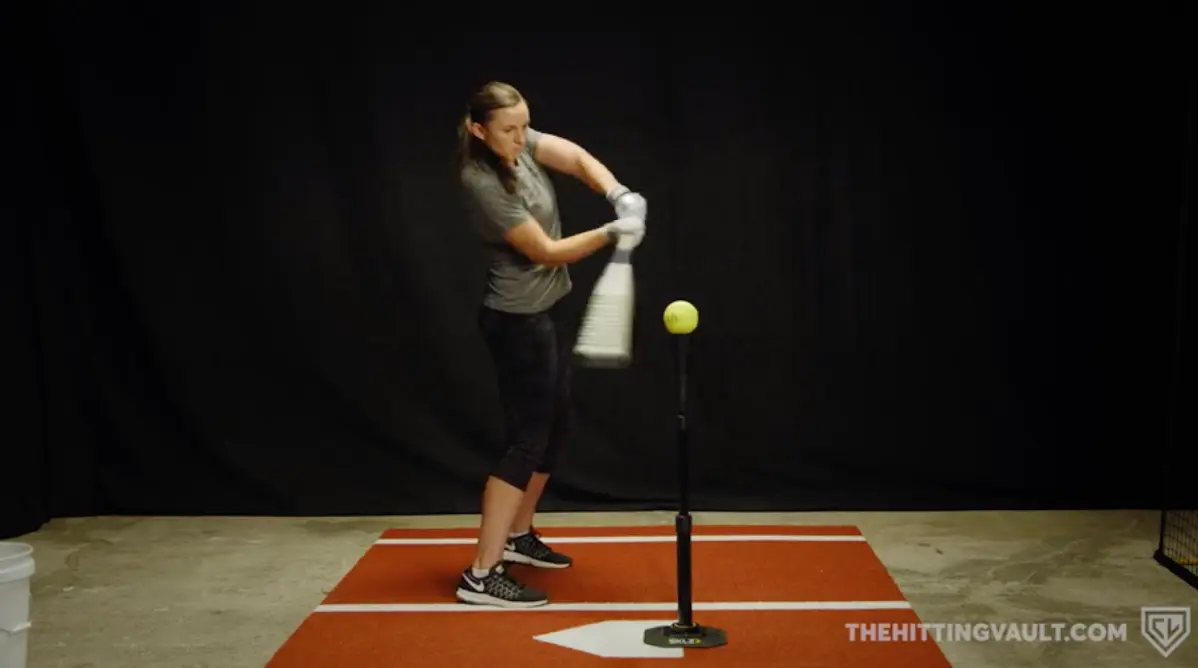
See Saw into Contact
The See Saw into contact drill should be the final drill in the tee drill station. This drill will be a good segway into the drills we’ll do in front toss in the next station. The purpose of this drill is to practice barrel control to contact and then making sure you get your elbows in the right position at the point of contact. Make sure the hands are above the barrel.
Star this drill by getting to a good launch position as shown below:
In this drill, you’ll want the hitter to pause at contact. This is how the hitter should look, notice how Coach Peterson’s top elbow and bottom elbows are bent, how her hands are palm up palm down, and she has great bat control. This creates a movement that puts the hitter on plane.
Note that in this photo her back toe actually has some pressure on it into the ground. This is because it is after she has made contact with the softball and therefore has essentially caught her balance. You should not squish the bug at contact, and at contact, the back foot should be weightless. It is okay that after contact the toes land on the ground like we see in this photo.
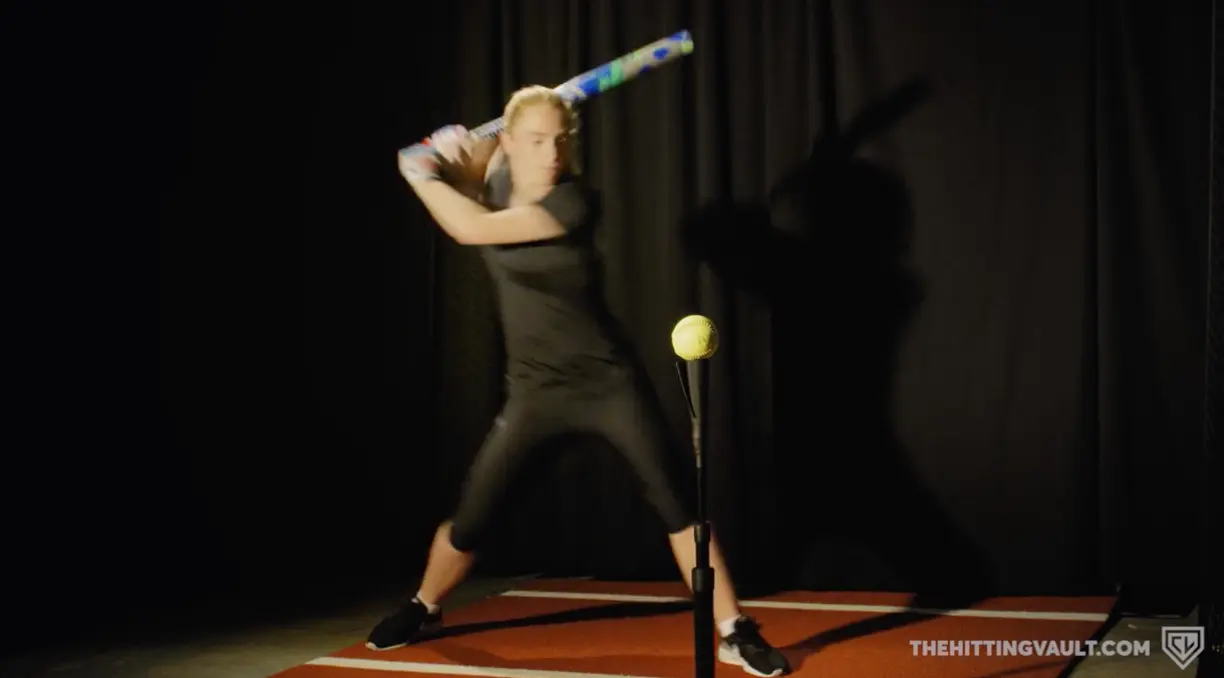
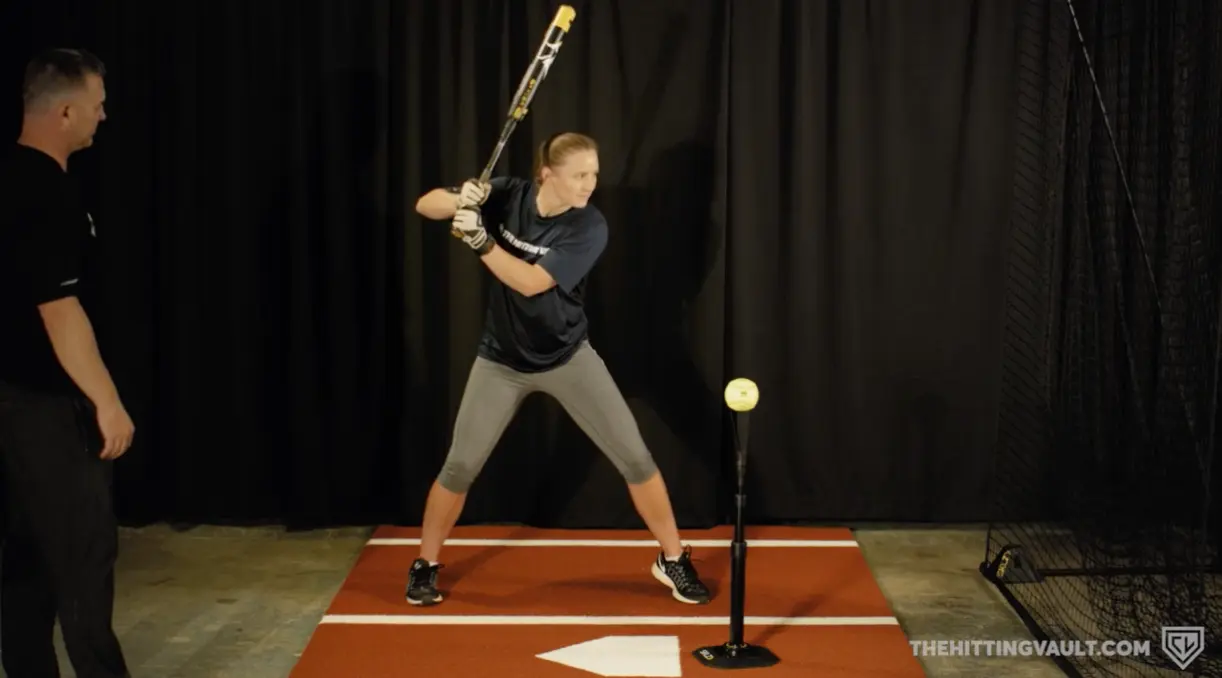
Station Three: Front Toss Drills
Now it is time to put these drills together in more complex movements and integrate timing with front toss.
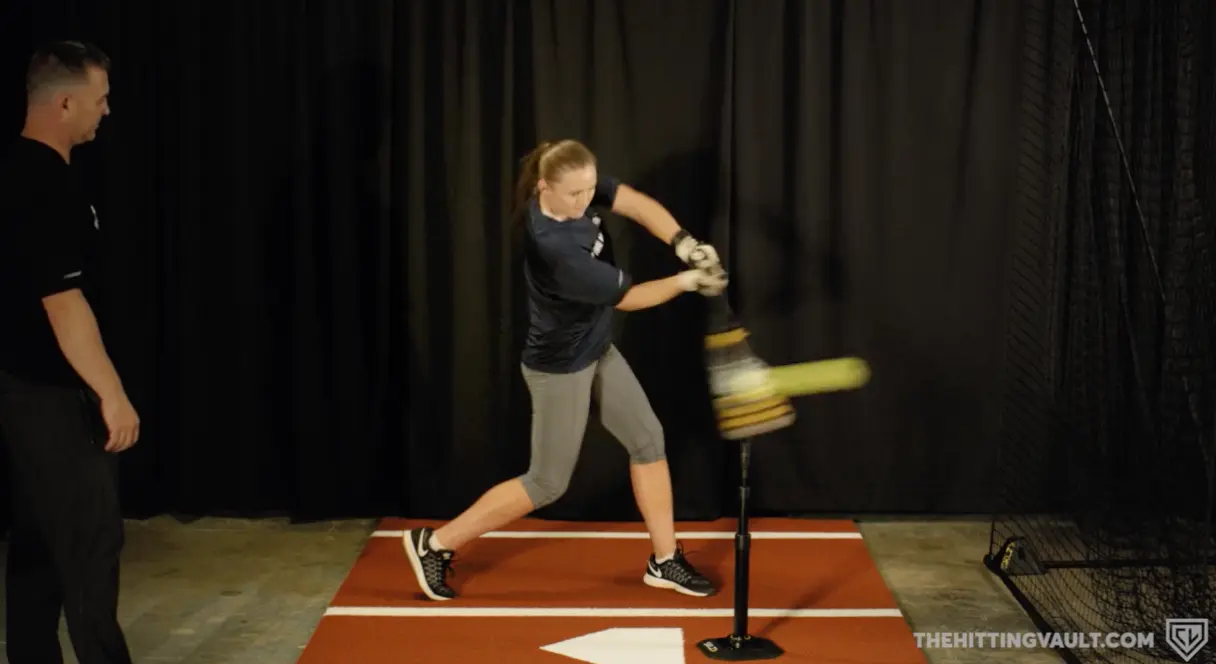
Get on Plane Drill
The get on plane drill helps hitters from chopping at the ball and instead of using torso tilt to adjust to pitches. This will create an effective path to the softball that will result in a better launch angle, exit speed, and ultimately more hits!
Start this drill by having your hitter face the pitcher. Then, they will want to focus on rotating their hips and getting the softball bat behind them when they swing.
Bat Path Drill
The bat path drill is another drill that builds off the previous ones before it. By feeling the movement of the bat dropping into the seesaw position and the heel dropping at the same time, it is going to help the hitter over exaggerate the barrel working behind them first instead of pushing towards the ball.


So to integrate this into front toss, have the hitter do 3-5 reps of feeling the heel fall and the bat fall into plane at the same time before throwing the ball and finishing the swing.
Finish Your Swing (or turn) Drill
To wrap up the front toss station, we want to work on extra rotation after hitting the ball. For this drill, you’ll want your hitters to over exaggerate the finish of their swing and pause. After pausing, their back should be showing to home plate without pulling their head.

In order to fully unlock your power, we teach our hitters the important of rotation. As simple as it sounds, it is so integral to a great swing. The Finish Your Swing drill is a great drill to help a hitter understand what full rotation feels like.
Station 4: Live
As Coach Lisle has frequently said, getting to live pitching as soon as possible is important to focus on in practice. At The Hitting Vault, we refer to the sequence of a good baseball or softball hitting practice as tee work, front toss and then live pitching. The tee work and front toss stations are great to focus on to get your hitters warmed up and feeling swing movements, and then you want to amp up the competition to live pitching.
Here is the order of preference for seeing “live” pitching at your softball practice.
- Live off an actual pitcher, throwing actual pitches.
- Benefits- hitters can work on balls and strikes, as well as timing. Pitchers can see what a hitter would actually swing at and what they wouldn’t. You can start with a 0-0 count or mix up what they start with!
- Negatives- If you have a small pitching staff be careful your pitchers are not throwing too many.
- Coach throwing live batting practice.
- Benefits: Coaches can work on specific pitches for hitters, paint the corners and work pitches inside and outside. This is also great for saving your pitching staff’s arms throughout the long season.
- Negatives: Some coaches may not be able to replicate the speed or movement that hitters will see from a live pitcher their own age. Throwing good batting practice takes practice and there is definitely an art to it!
- Pitching Machine
- Benefits: Easily replicate pitch .velocity and location that your hitters will likely see in games.
- Negatives: Timing can be an issue for some hitters coming out of the machine. The bottom line is that seeing the softball from a machine is different than seeing it live out of the pitcher’s hand. In practice, we want to create an atmosphere that’s as close to a live game as possible.
If you had the choice between live pitching and machine pitching, choose live every time! Live pitching is not only great for hitters being able to decide balls and strikes and helps with timing, but it also is very beneficial for pitchers being able to see when a hitter would really swing at a pitch or not.
Live batting practice should be broken into two rounds, getting the job done and a round of swinging away.
Round One: Getting the Job Done
The goal here is to put the ball in play and move runners into scoring position or score them.
- Bunts X2
- Hit and runs X2
- Angle down to drive in the runner X2
- Regular swings to drive in the runner X6
Runners need to be getting game speed reads here. If it’s a hit and run they should essentially be stealing, but need to read the ball right off the bat whether they should go back and tag or not. The defense needs to be playing all these out. This brings competition to practice, this brings speed to the drills, and makes your team better.
Round Two: Swing Away
Defense makes plays, hitters have six to ten swings to do damage. The pitcher should work side to side, up and down, mix in a rise ball if possible, but these hitters need their hacks.
Rotate groups through the rounds two to three times to get them as many reps as you can before entering the competition round. Remember, quality trumps quantity in batting practice so make sure your hitters are taking quality swings. Check out our article, how many reps for more information on how many swings your hitters should be taking in practice.
Competition Round
Credit Coach Frank Niles with this one. The competition round helped win games in high school because it brings serious intensity, competition, and fun to the end of practice. Pick three captains, and have them draft teams.
One team will hit, while the other two plays defense. The team with the most points at the end of the competition round will win. Reward the team for winning, and be creative. A common one is to have the winning team get relieved of picking up the gear at the end of practice.
The team hitting will have 3 rounds to hit and get points.
Another level of competition you can add in if they’re old enough is: if they watch a strike go by or swing at a ball, their at-bat is over for that round and it goes to the next person.
Round One:
One swing, if it is a hit, it is a point. If it is anything else no points will be awarded.
Round Two:
The defense can turn double plays (4 second time limit) to take away 2 points from the team hitting.
The team hitting will still have one swing. If it is a hit or an error, a point will be awarded. If an out is recorded, no points will be given.
Round Three:
The defense can turn double plays (4 second time limit) to take away 2 points from the team hitting.
The team hitting, if it is a hit it is a point and the hitter stays up until she no longer records a point. The third round gets loud and intense. Hitters can get hot and stay up as long as they are putting the ball in play for a hit or an error.
The teams will all get a chance to hit. The defense has to make plays under a pressure simulation. To have 21 outs and the competition round and this integrated, practice will be more intense and more competitive.
The Hitting Vault is the most popular, most trusted and highest rated online hitting community.
The Hitting Vault shows athletes how to move their body to unlock their most powerful swing. It’s designed to help coaches get optimal results from their athletes. Join now and get access to over 100+ exclusive videos for members. Each video includes step-by-step instruction so you’ll know exactly how to unlock your power at the plate.