6 Resistance Band Exercises for Baseball and Softball Players
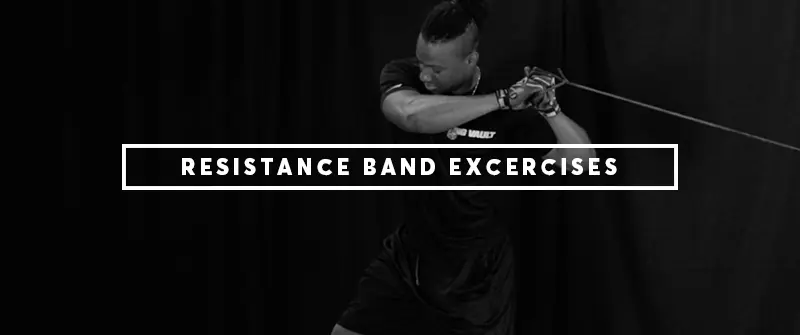
Table of Contents
In The MVP Machine, a book that explores the world of advanced baseball training and development techniques, resistance bands are noted as a key but a once-uncommon tool that a young amateur pitcher named Trevor Bauer used to build his arm strength and ultimately become one of the game’s dominant hurlers.
“When Trevor was twelve, [Alan] Jaeger [his pitching coach] put him on a routine that perhaps no other kid in the country would have recognized.
Before Bauer began a throwing session, he used TheraBand rubber tubing to attach his right wrist to a static object like a fence or railing. He then performed a series of resistance exercises originally designed to rehabilitate torn rotator cuffs. The bands worked his external and internal rotation.”
Over the past two decades, resistance bands — which are essentially large rubber bands made in varying degrees of tension — have exploded in popularity among baseball and softball players, who utilize them for both strength training and injury prevention.
Once a tool leveraged primarily by physical therapists, today they’re employed by coaches and players at all levels of the game.
This article will provide clarity and direction on the proper use of resistance bands in baseball and softball training, and will give you a few examples of exercises you can integrate into your existing warmup and recovery program.
6 Resistance Band Exercises for Baseball and Softball Players
Each of the exercises in our list below has been labeled “best for” a particular type of athlete (e.g., a baseball pitcher or a softball position player), but they can each be used by all types of players as long as they’re performed correctly.
We’ve also recommended a particular type of band for each of the exercises listed below. You can learn more about each brand in the Types of Resistance Bands section at the end of this article.
1. Throwing Motion
Best for: Baseball pitchers (warmup).
Best band to use: Jaeger.
How to do it:
- Attach the carabiner clip to a fence (or loop the band around a pole).
- Attach the Velcro straps to both wrists.
- Turn your body so that your back is to the clip and the bands are behind you.
- By utilizing both arms, complete the throwing motion at a slow pace (i.e., take 5 to 8 seconds to complete the entire throwing motion).
- Pause slightly at the final phase of the throwing motion and slowly reverse the arm action to return to the starting point.
How many sets and reps:
- Novice: 2 sets of 4 to 6 reps.
- Intermediate: 3 sets of 6 to 8 reps.
- Expert: 5 sets of 8 to 10 reps.
Purpose: This exercise helps improve bloodflow to the muscles of the shoulder, back and chest. Warming up those muscles properly can lead to a decrease in the incidence of injury.
What to look for: If the band has too much tension, the throwing motion will look strained rather than fluid. This movement should not require excess exertion.
2. Banded Victory
Best for: Baseball pitchers (recovery).
Best band to use: Jaeger or Crossover.
How to do it:
- Clip two crossover bands or one Jaeger band to the side of a sturdy object (such as a fence or workout rig).
- With the bands in your hands or Velcroed to your wrist, face the bands and move backward approximately four feet away from the fence. There should be some tension on the bands, but not enough to pull you forward.
- With your legs shoulder-width apart, lower your hips into a quarter squat position and extend both arms so that your hands are approximately hip height.
- Begin with palms facing downward. First, engage your shoulder blades (which is best accomplished by adjusting your upper back into a strong posture position).
- While keeping the elbows straight, slowly raise your arms overhead into a “victory” formation (a.k.a., a Y position) overhead.
- When this exercise is done properly, the athlete should feel his or her lower trapezius fibers (the muscle fibers below the shoulder blade) begin to activate.
How many sets and reps:
- Novice: 2 sets of 4 to 6 reps at 10-second tempo (5 seconds to raise hands up, 5 seconds to lower hands back down).
- Intermediate: 3 sets of 6 to 8 reps at 8-second tempo (4 seconds to raise hands up, 4 seconds to lower hands back down).
- Expert: 5 sets of 8 to 10 reps at 8-second tempo (4 seconds to raise hands up, 4 seconds to lower hands back down).
Purpose: This exercise helps to strengthen the muscles of the back side of the shoulder (i.e., the rotator cuff) while in the overhead position.
Most common arm injuries occur because the shoulder blade cannot properly rotate to get the arm into an overhead position. Due to this restriction, an athlete will compensate by arching the back, shrugging the shoulders or bending the elbows.
You can observe and correct this fairly quickly with the slow and controlled execution of this exercise.
What to look for: For this exercise, ensure that you or your athlete is not arching the back in order to achieve the overhead position.
Be aware that often, an athlete will achieve an overhead position by compensating and shrugging the larger muscle fibers of his or her upper trapezius in order to obtain an overhead position, or by bending the elbows to shorten the lever arm and make the movement easier.
Keep in mind that not all athletes will be capable of getting to the full overhead position with their elbows straight. If this is the case, reduce the band tension by changing bands or moving closer to the fence.
Once an athlete begins to show signs of these compensations, they have effectively bypassed the benefits and main purpose of the exercise and it’s time to either move on to a different exercise or reduce the resistance of the band.
3. Banded Goodmornings
Best for: Softball pitchers (warmup).
Best band to use: Long loop resistance bands.
How to do it:
- Begin by stepping with both feet on the end of the band, and place the other side of the band around your upper back. It should appear that from your shoulders to your feet you are encased inside the long loop of the band.
- Next, begin the hinge action by driving your hips backward. This should be done without continuously bending the knee.
- Lastly, once you have reached the end range of your hinge action, you can return to a standing upright position by driving your hips forward.
How many sets and reps:
- Novice: 2 sets of 8 to 10 reps.
- Intermediate: 3 sets of 8 to 10 reps.
- Expert: 5 sets of 8 to 10 reps.
Purpose: This exercise focuses on activating the muscles of the posterior chain of the body (i.e., the hamstrings, glutes and back). All of these muscles are active in both driving off the pitching rubber and in landing after the ball is released.
Although it appears that this is not a shoulder exercise, supporting the back in the proper posture will require adequate activation from the muscles of the upper back — particularly those surrounding the scapula.
What to look for: Ensure that the hips drive backward and the knees do not continue bending throughout the motion. Additionally, it’s important to note that the knees should not be hyper-extended.
There should be a slight, athletic bend that remains throughout the course of the exercise. There should be no rounding of the spine (upper, middle or lower back). Once the athlete can no longer hip hinge, they will push against the resistance of the band and stand back up again.
4. Banded Lat Stretch
Note that the “Banded Victory” exercise shown above (for a baseball pitcher) is also a phenomenal exercise choice for a softball pitcher.
Best for: Softball pitchers (recovery).
Best band to use: Long loop resistance bands.
How to do it:
- Fasten a band to the top of a fence or pull-up bar.
- Grab onto the band with the hand that’s furthest from it.
- With the same side that is holding the band, take a knee and allow your hand to reach overhead.
- Lastly, push your hips in the opposite direction of the band tension and work to lengthen your lat muscle.
How many sets and reps:
- Novice: 2 sets of 30-second holds on each side.
- Intermediate: 3 sets of 45-second holds on each side.
- Expert: 5 sets of 60-second holds on each side.
Purpose: The latissimus dorsi (often referred to as ‘the lat’) is responsible for adduction, extension and internal rotation of the shoulder joint. It also aids in extension and lateral flexion of the lumbar spine (i.e., the lower back).
Before running for your anatomy textbook, just know that the lat is involved in a lot of what we do as athletes. For softball pitchers, in particular, the lat can tighten up and contribute to shoulder or back discomfort over the course of a season. Maintaining a stretching routine that focuses on the back can protect the pitcher from injury.
What to look for: Avoid overstretching the shoulder joint. It’s important that the athlete feels a light stretch from behind their shoulders toward their lower back. They should not allow their shoulder joint to completely relax. If the athlete feels shoulder discomfort, switch to a band with lighter tension.
5. Glute Walks
Best for: Baseball and softball hitters (warmup).
Best band to use: Short loop resistance bands.
How to do it:
- Place the short loop band around both legs and position the band slightly above the knee joint.
- Sit the hips and bend the knees into an athletic position, similar to the ready stance an outfielder would take.
- Begin by taking a step 1 to 2 inches to the right, leading with the heel of the right foot.
- Next, move the left foot 1 to 2 inches to the right.
- The focus of this movement should be on maintaining band tension and an athletic stance throughout the duration of the rep.
How many sets and reps:
- Novice: 2 sets of 8 to 10 reps each way.
- Intermediate: 3 sets of 10 to 12 reps each way.
- Expert: 5 sets of 12 to 14 reps each way.
Purpose: The purpose of the glute walk is to activate the muscles responsible for external rotation of the hip joint. When a hitter begins to create a blocking force up against their front side (i.e., a stiff front leg), they’re relying on the external rotators of the hip to stabilize their blockade. The glute walk is a great tool for firing these muscle groups in order to ensure a strong front side when hitting!
What to look for: Most athletes only focus on the lead leg (the one they’re stepping with) when performing this exercise, but it’s just as important to have a strong and engaged back leg as well. So, after each step, check the back leg to make sure the knee is stacked on top of the ankle.
6. Banded Anti-Rotation Press
Best for: Baseball and softball hitters (recovery).
Best band to use: Long loop resistance bands.
How to do it:
- Fasten a band to the side of a fence or pole.
- Take a knee on the side that is closest to the band, approximately 2-3 feet away from the pole.
- Grab onto the band with both hands and extend both elbows so that the hands are directly in front of your chest.
- Bring your hands into your chest and press back out to the start position.
- The focus of this exercise should be on preventing the hands from getting pulled back toward the band.
How many sets and reps:
- Novice: 2 sets of 8 to 10 reps each way.
- Intermediate: 3 sets of 10 to 12 reps each way.
- Expert: 5 sets of 12 to 14 reps each way.
Purpose: The purpose of this banded exercise is to stabilize the muscles of the torso while arm flexion and extension occur. Being able to apply resistance against the banded tension while the athlete moves his or her arms will enable them to establish stronger positions throughout the various phases of the swing.
What to look for: It’s important that the band does not cause the athlete to lean or rotate back toward the tension of the band. You’ll know this is happening because the athlete will appear to be leaning or falling in the direction of where the band is fastened. If this occurs, use a band with less tension, move closer to the pole the band is attached to, or complete the exercise at a slower pace.
Types of Resistance Bands
It’s important to familiarize yourself with some of the different types of bands that exist. While many brands offer similar products, there are a few different styles that function better or worse for particular purposes.
Also, although there are hundreds (if not thousands) of generic brands on the market, there are a few industry standards that are known to consistently produce quality products.
We use these brands at Athletes Warehouse, a facility that trains over 500 athletes every week. The bands listed below have endured constant use over the course of the past five years, seldom needing replacement.
Bands Designed Specifically for Baseball and Softball
Jaeger Bands
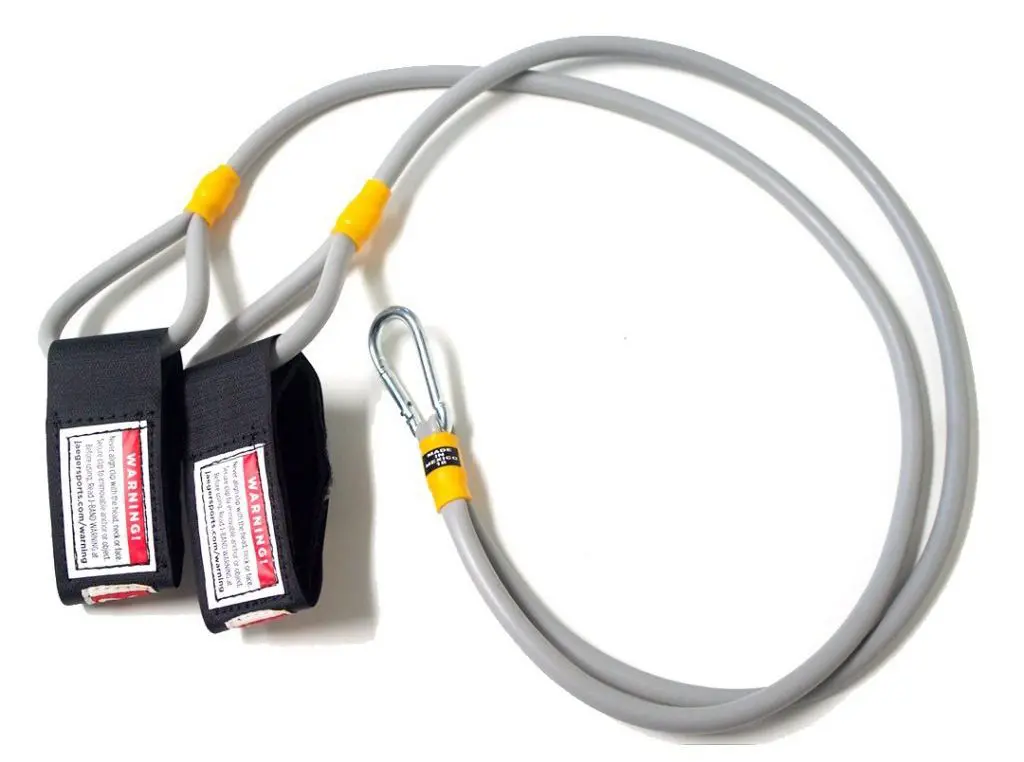
Best used for: Throwing-related exercises. We’re often asked whether an athlete should use these bands before or after throwing. The answer can be “both.” There are certain exercises that warm up the muscles prior to use, and others that induce muscular fatigue and which are best-utilized post-activity.
Jaeger bands, which are named after the same Alan Jaeger mentioned in the intro and are sometimes called J-Bands, are specifically designed for baseball and softball throwing development.
One end features a built-in clip that can snap onto a fence, and the other end features a Velcro attachment that can be easily affixed to an athlete’s wrist in order to emulate the throwing motion or other arm movements.
Limitations: Due to their design, J-Bands are not ideal for training lower-body movements.
Crossover Symmetry

Best used for: As with J-Bands, these are excellent bands for strengthening the posterior side of a baseball or softball player’s shoulder. Crossover Symmetry’s bands also have a fence clip and come in varied resistances.
Typically, the heavier-weighted bands would be utilized post-activity, and the lighter-weighted bands would be utilized as a warm-up tool prior to throwing.
Limitations: Having to hold the handles as opposed to strapping them onto the wrist can be a strength or a limitation, depending on the situation. We have worked with plenty of athletes that struggle to strengthen their shoulders because of elbow discomfort when gripping onto a band or weight.
Many of the muscles that cross the elbow joint are located in the forearm and can become aggravated by the hand gripping a handle or weight. In this situation, a J-Band is a better option because the athlete does not have to wrap their hand around anything in order to complete the exercise and can instead fasten the band via velcro to his or her wrist.
Rawlings Baseball Resistance Band
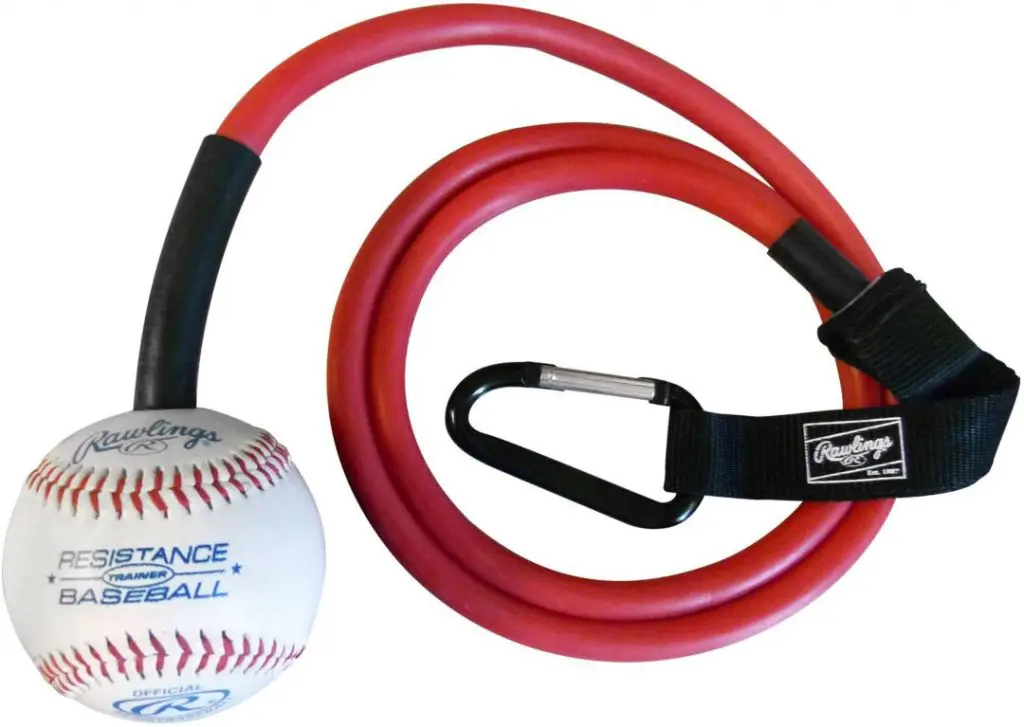
The Rawlings Baseball Resistance Band is very similar to the Jaeger band in that it can easily clip to a fence. This band adds a baseball-specific component by having a baseball attached to the end.
Although this may appear to be advantageous for the baseball athlete, the lack of a strap or handle actually limits the number of exercises that can be performed with this particular band.
If having a baseball in hand was something the athlete or coach wanted to focus on, I would recommend strapping the Jaeger band to the wrist and simply holding a baseball instead.
Other Types of Resistance Bands
Long Loop Resistance Bands
Best used for: These bands come in resistance weights from 15 pounds to 200 pounds, so the potential for exercise utilization is almost limitless. Typically, these bands are best used for strengthening and stretching the larger muscles of the body (i.e., the back, hips and legs).
Limitations: Without a clip to easily attach the band to a fence, it can be difficult to find ways to fasten these bands to a stationary object outside of a traditional gym setting.
Additionally, even the lightest band (15 pounds) is sometimes too heavy for focusing on the smaller muscles of the rotator cuff in throwing athletes.
Short Loop Resistance Bands
Best used for: These smaller bands are best used to loop around the legs and feet of athletes. They can be instrumental in activating important musculature of the hips, and can be a great asset to add to an athlete’s pre-practice or pre-game routine.
Limitations: Obviously, the smaller the band the more limited the potential exercise list. Although these bands are fantastic, I wouldn’t make them the only band utilized. Instead, use them in conjunction with the ones mentioned above.
Frequently Asked Questions
Here are some of the most frequently asked questions about resistance band training for baseball and softball athletes.
Resistance bands are an exercise tool that can be utilized for a multitude of purposes, such as arm exercises, stability and mobility work (depending on the needs of the athlete).
Just like a bat doesn’t make you a great hitter, resistance bands only work as well as the athlete using them. The type of band, the purpose of the exercise, and the intent with which the band is used will determine how resistance bands make an impact on an athlete during his or her workout or throwing program.
No, and it would be incorrect to assume that an athlete seeking performance improvements can be properly developed and trained using only one training modality.
Regardless of whether the goal of the workout is to just improve arm health or become a better athlete, a combination of resistance bands, weight training and other training methodologies will yield the highest benefit for the athlete.
Unfortunately, there is no single answer to this question. It depends on the athlete, their position, the type of band, the exercise being used with the band, etc. There is a time and place for completing band work prior to playing; however, it’s important to understand that not all exercises, athletes and bands are created equal.
You can utilize certain band work prior to competition for the purpose of warming the muscles up without fatiguing them, which is often a more effective pre-activity routine than traditional static stretching.
Although resistance bands appear safer than moving heavy weights in a weight room, like any exercise tool there are risks associated that every athlete and coach should be aware of.
Keep in mind that practice does not make perfect: it makes permanent. Therefore, if an athlete is continuously completing a band exercise incorrectly, he or she is potentially increasing the risk of injury instead of mitigating the risk.
That’s especially true when it comes to the intricacies of the shoulder, so it’s imperative to have an educated professional working with the athlete on the proper ways of completing these movements.

Cassie Reilly Boccia
Cassie Reilly-Boccia is the Director of Research and Development and Intern Curriculum at Athletes Warehouse in Pleasantville, New York. She is a graduate of the University of Alabama (BS). In 2012, she and her team won the Women’s College World Series.
The Hitting Vault is the most popular, most trusted and highest rated online hitting community.
It was created to teach athletes how to move their body to unlock their most powerful swing. It’s designed to help coaches get optimal results from their athletes. Join and get access to over 100+ exclusive videos for members and step-by-step instruction so you’ll know exactly what to do next to unlock your power at the plate.